
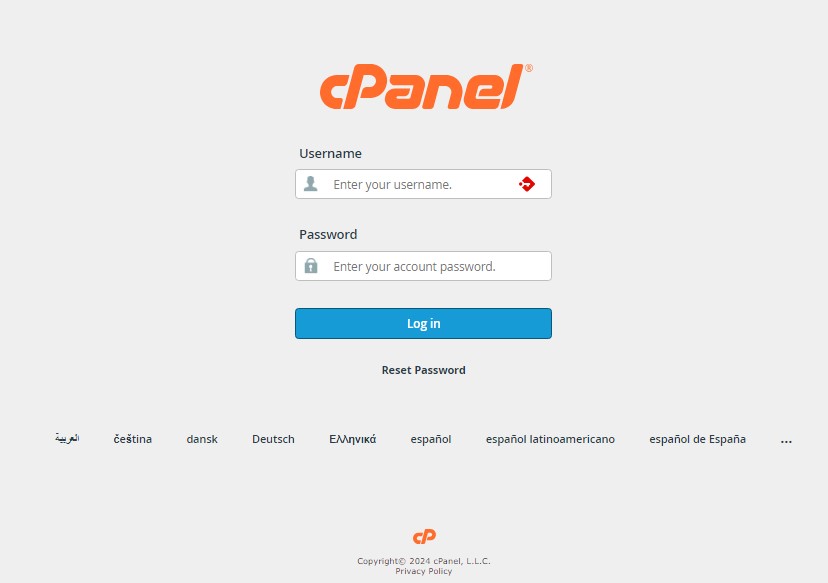
Step 1: Log in to cPanel
- Access cPanel:
-
- Open your web browser and navigate to your cPanel login page. This is typically yourdomain.com/cpanel or yourdomain.com:2083
- Enter your cPanel username and password to log in.
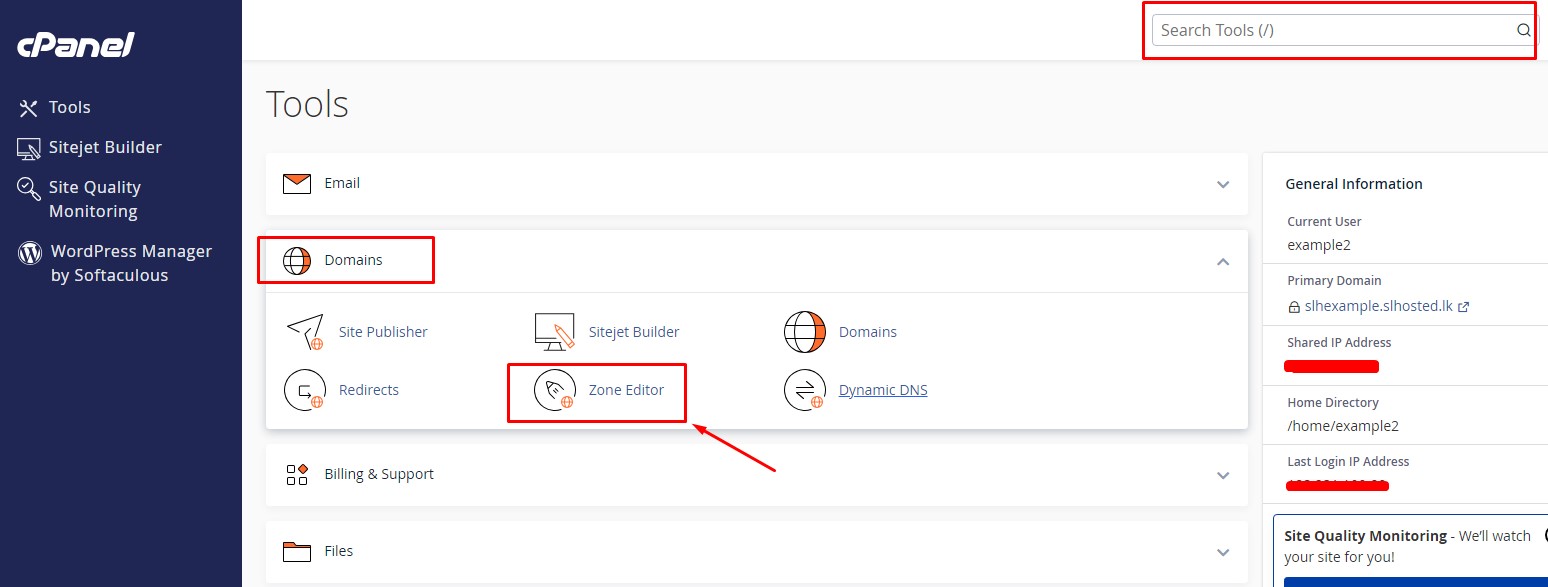
Step 2: Locate Zone Editor
- Find the Domains Section:
-
- Once you’re logged in, look for the Domains section on your cPanel dashboard.
- Click on Zone Editor to proceed.
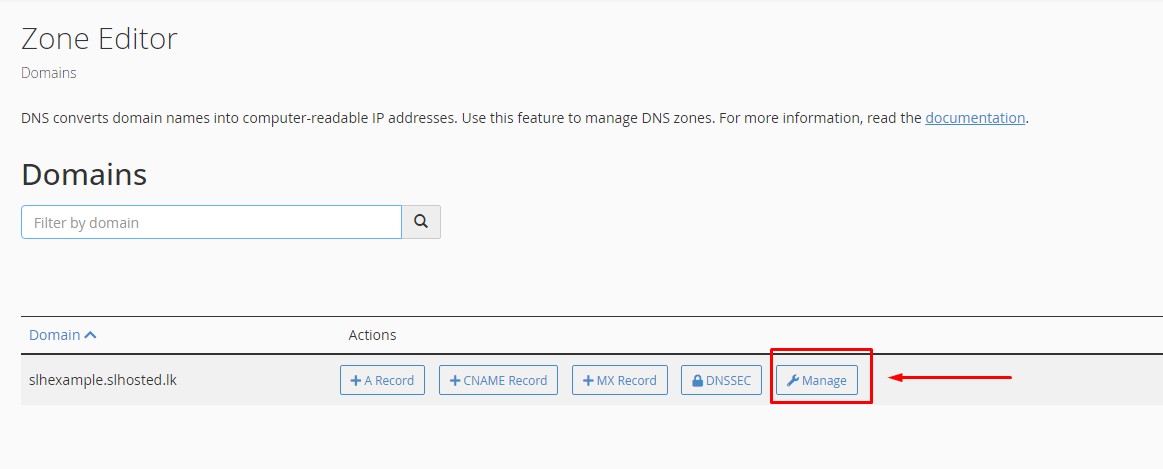
Step 3: Manage DNS Records
- Select the domain:
-
- Find the domain for which you want to add or manage DNS records.
- Click Manage next to the domain.
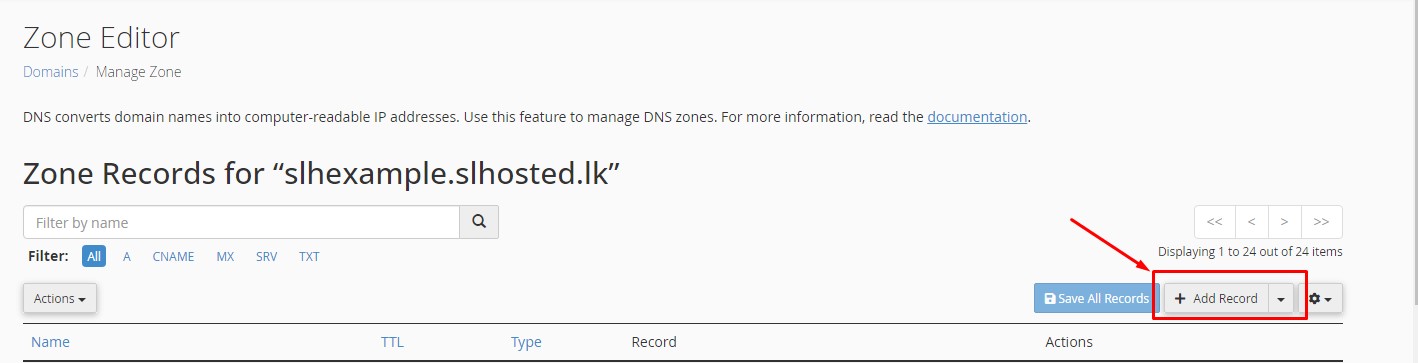
Step 4: Add a DNS record
- In the Zone Editor, click Add Record.
Step 5: Fill in the DNS details
- Enter the type of DNS record (A, CNAME, MX, etc.), the name, and the value (such as IP address or target domain).
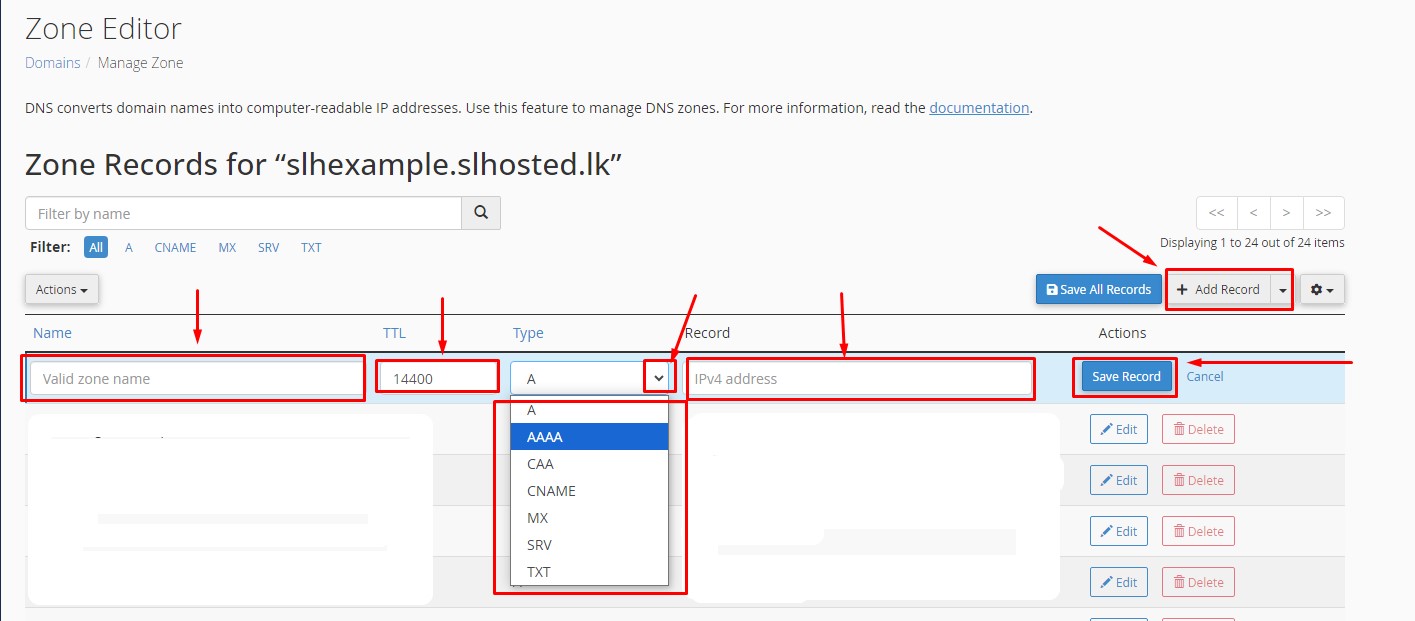
- Click Save Record to finalize the changes.


