
Step 1: Create or Log in to Your Cloudflare Account.
- Go to https://www.cloudflare.com using your web browser.
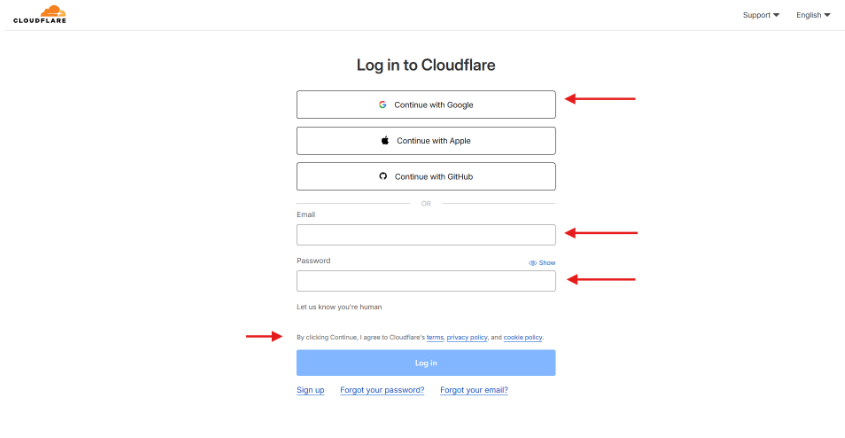
- You can create a Cloudflare account using your Gmail address directly.
- If you don’t want to use Gmail, you can also create a new account by entering your email address and password manually.
When creating your account, make sure to agree to Cloudflare’s Terms and Conditions to continue.
Step 2: Add Your Domain to Cloudflare.
- After logging in to your new Cloudflare account, you will see your Cloudflare dashboard.
- From there, click Add button.
- Type your domain name and click Continue.
- Cloudflare will then start checking your current DNS records. Once the scan is complete, you can view or edit your DNS settings.
This is where you can add, remove, or update DNS records for your domain.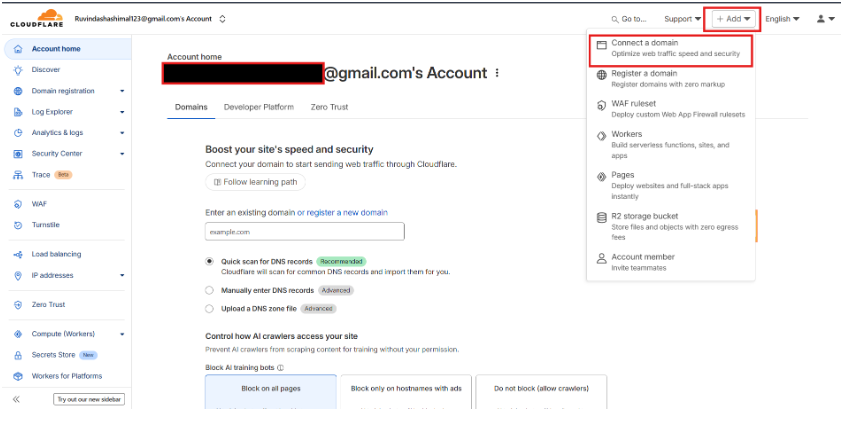
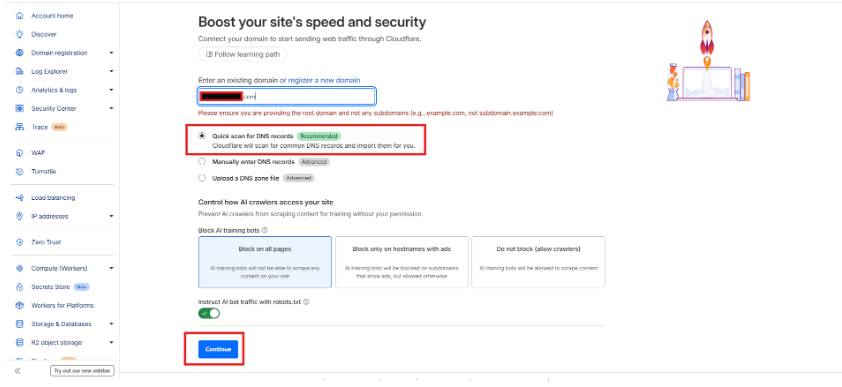
- After you type your domain name, Cloudflare will show some recommended settings for your website.
- You can keep these default settings and click Continue.
- Once you confirm, your domain will be successfully added to Cloudflare.
- If your domain already exists somewhere else, Cloudflare will still let you connect and manage it easily through your new account.
Step 3: Choose a Cloudflare Plan.
- After adding your domain, Cloudflare will show you several plan options.
- Each plan comes with different features and benefits.
- For most users, the Free Plan is enough because it includes essential features like DNS management, security protection, and faster website loading.
So, you can simply select the Free Plan and click Continue to move to the next step.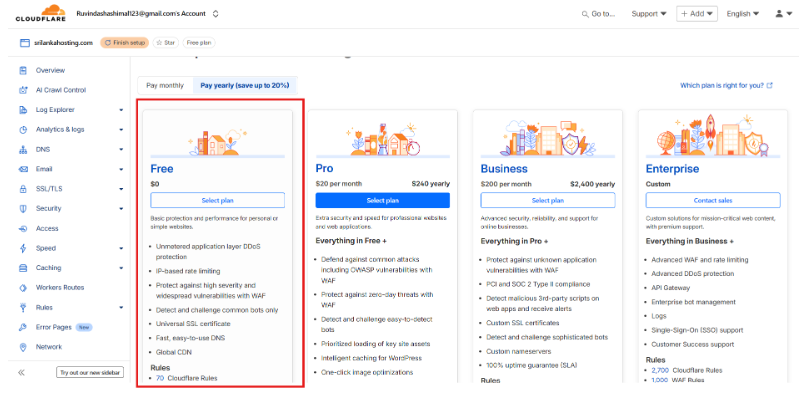
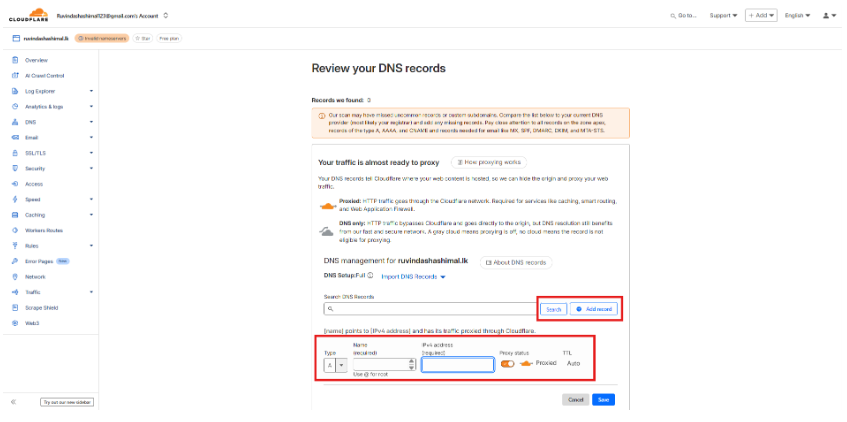
Step 4: Review and Import DNS Records.
After choosing your plan, Cloudflare will automatically scan and show your DNS records such as A, CNAME, MX, and TXT.
- Check each record carefully to make sure the IP addresses and hostnames are correct.
- If something is missing or wrong, you can add, edit, or delete records as needed.
- Once everything looks correct, click Continue to move forward.
Step 5: Update Your Domain Nameservers.
- Cloudflare will provide two nameservers (e.g., anna.ns.cloudflare.com and bob.ns.cloudflare.com).
- Go to your domain registrar (where you bought your domain).
- Find the Nameserver Settings section.
- Replace the existing nameservers with the two provided by Cloudflare.
- Save the changes.
Note: DNS changes may take up to 24 hours to propagate globally.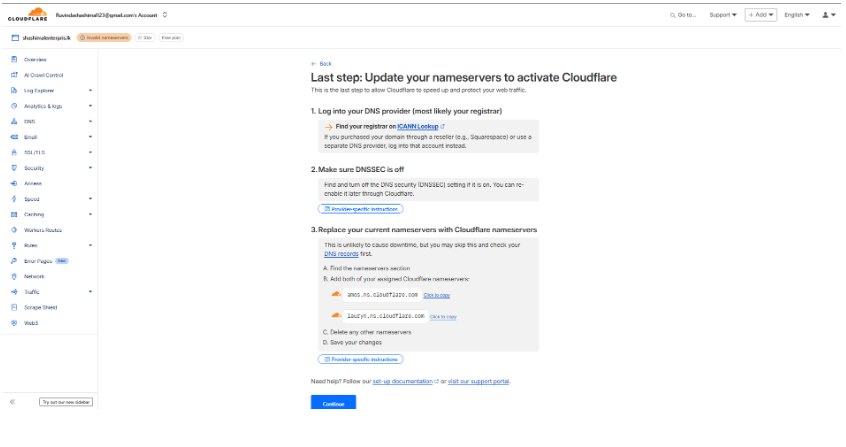
Step 6: Verify Domain Setup.
- Return to your Cloudflare dashboard.
- Once your nameservers update, Cloudflare will automatically detect the change.
- You’ll see a Active status next to your domain name.
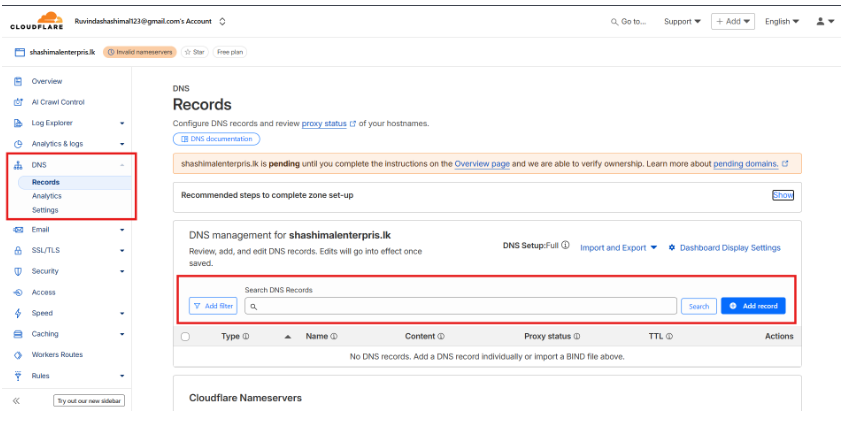
Step 7: Manage DNS Records in Cloudflare.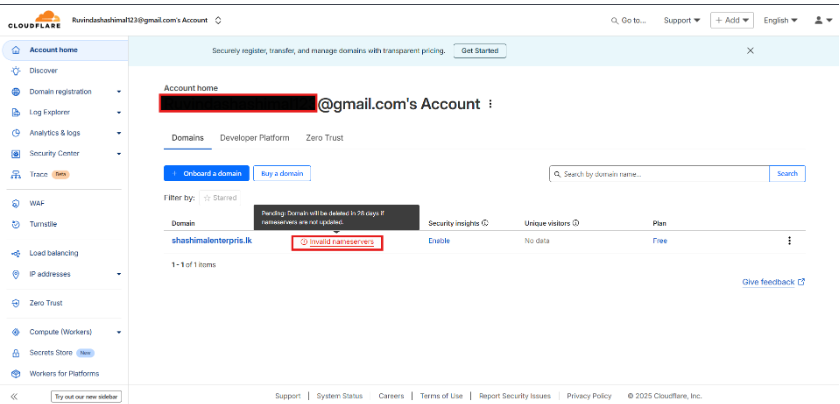
After your domain is active:
Go to the DNS tab in Cloudflare.
Here you can:
- Add a new record: e.g., A, CNAME, MX, TXT, etc.
- Edit existing records: Change IPs or hostnames easily.
- Delete old records: Remove unused or wrong records.
To add a record:
- Click Add Record.
- Select the record type (A, CNAME, MX, etc.).
- Enter the details and click Save.
Tip: The orange cloud icon next to a record means Cloudflare’s CDN and protection are enabled for that record. If you turn it grey, it will bypass Cloudflare and go directly to your server.


