
Step 1: Login to cPanel.
- Follow the link below for the guide.
//www.srilankahosting.com/knowledgebase-new/how-do-i-access-cpanel
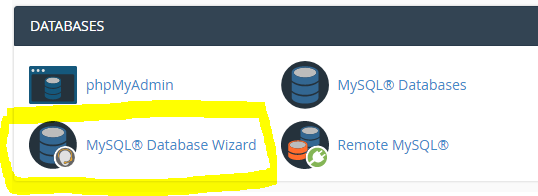
Step 2: Finding the Database section in cPanel.
- You can either search it on the search box or scroll down until you find it.
.png)
- There are two ways to create a database in cPanel.
1. Creating a database with the MySQL Database Wizard tool.
2. Creating a database from the MySQL Databases menu.
Let’s check out the First Method.
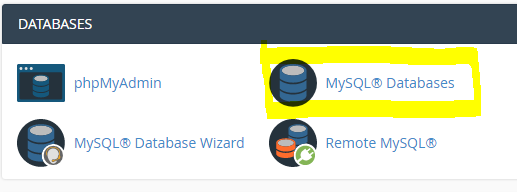
Step 3: Click on the MySQL Database Wizard icon.
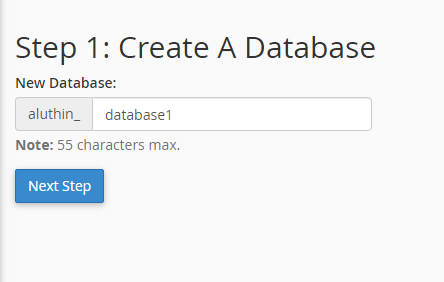
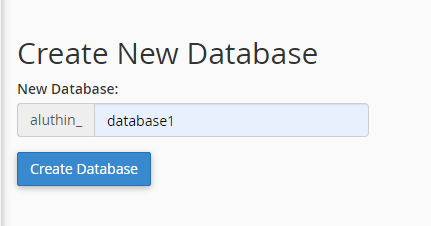
Step 4: Creating the database.
- Find the Create New Database section, then simply indicate the name of the future database, and click on the Create Database button as shown in the image below.
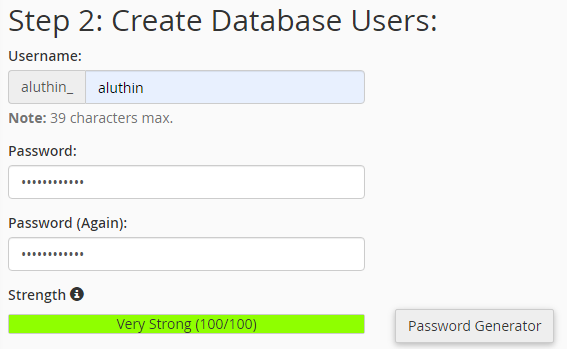
Step 5: Creating a user.
- Now, in order to be able to fill and maintain the database, MySQL User should be created and assigned to the database with correct privileges.
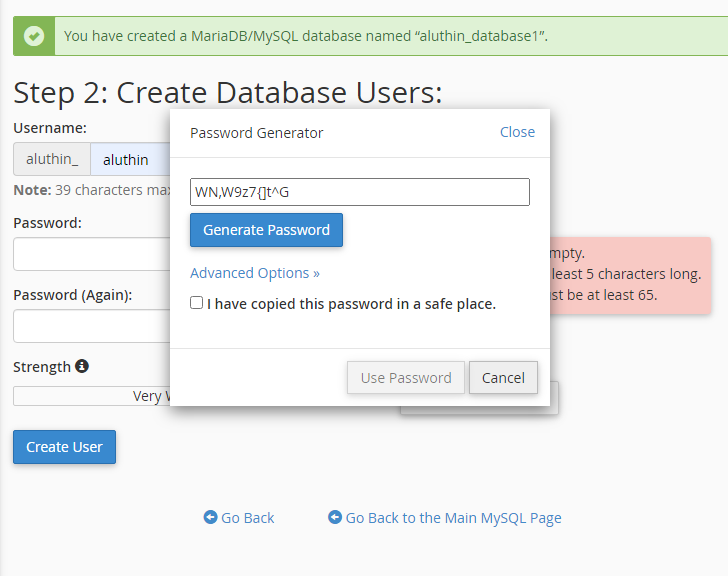
- Here, you need to generate a strong password and save it somewhere safe to use in the future.
Step 6: Assigning User Privileges.
- Here, you can decide which privileges you want to give a user you are creating.

- Okay, now you are finished creating the database and the user.
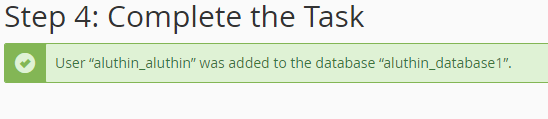
- If this message appears on the screen, then you are successful!
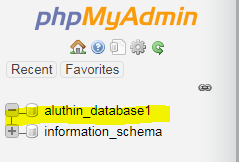
- You can check your database in phpMyAdmin.
Second Method
Step 1: Find the MySQL Databases icon.
- In order to start, log into cPanel and click on the MySQL databases menu in the Databases section:
Step 2: Create the database.
- Type down your database name and hit the Create Database button.
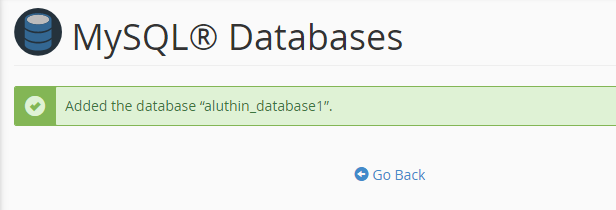
- Once your database is successfully created, go back to create a user.
Step 3: Creating the User.
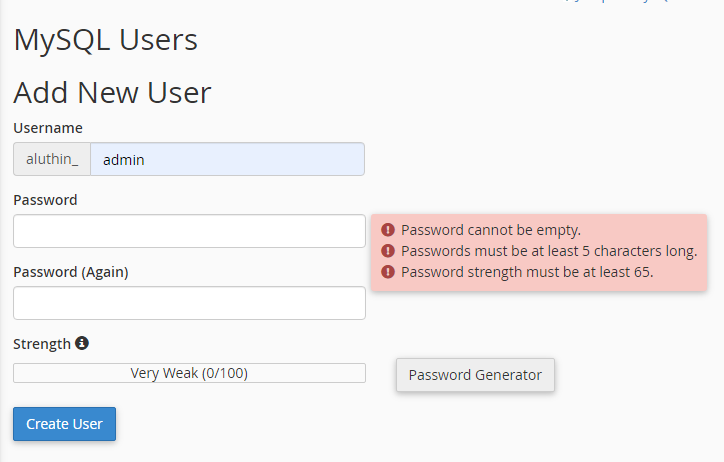
- Here, when creating the user generate a strong password and make sure to save it somewhere safe for future use.
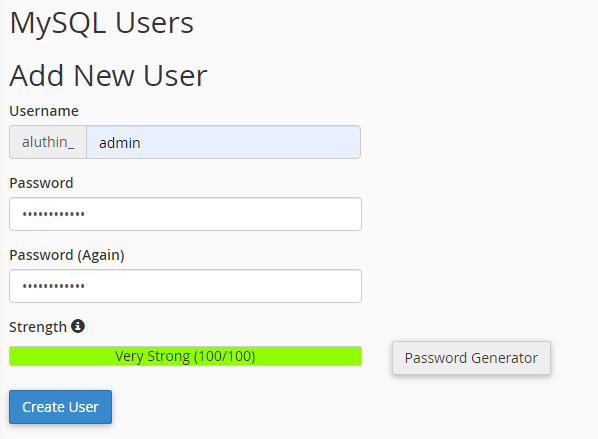
- Once finished, hit the ‘Create User’ button to add a user.
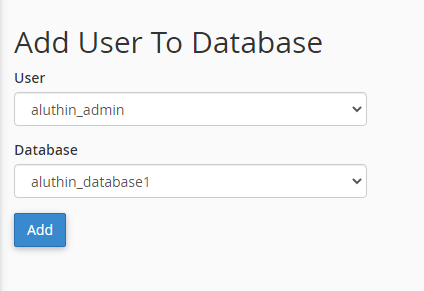
Step 4: Adding the user to the Database.
- To do this, find the Add User to Database section and make sure that you choose the correct Database and User correspondingly. Once done, simply click on the Add button:
Step 5: Assigning Privileges.
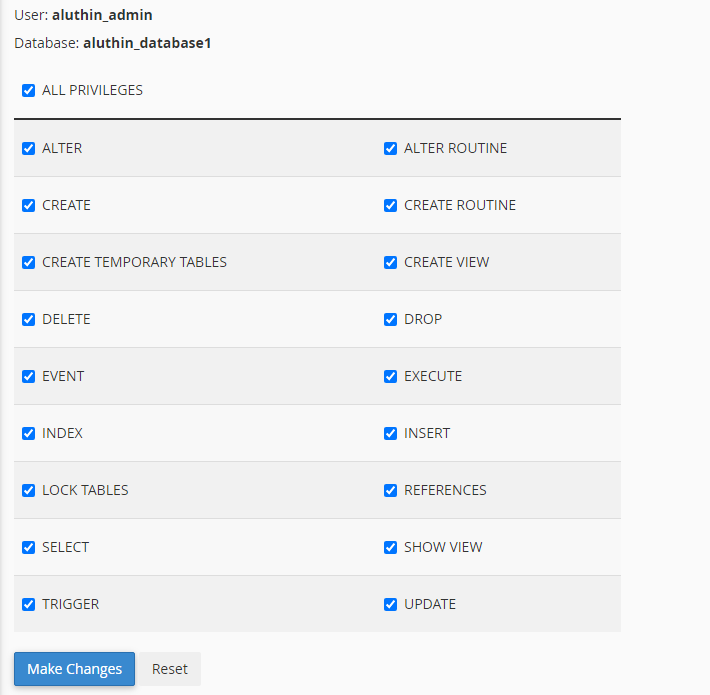
- Once you’ve successfully added the user you have to assign privileges.
- You will need to set correct privileges to the MySQL User. In the following example, we shall grant all privileges to be able to maintain our MySQLDatabase without any restrictions, so you simply need to choose the All Privileges option and click on the Make Changes button:
- Once you’ve successfully done it.

- To check your database you can simply go back to the MySQL Databases menu and check the Current Databases section.


