
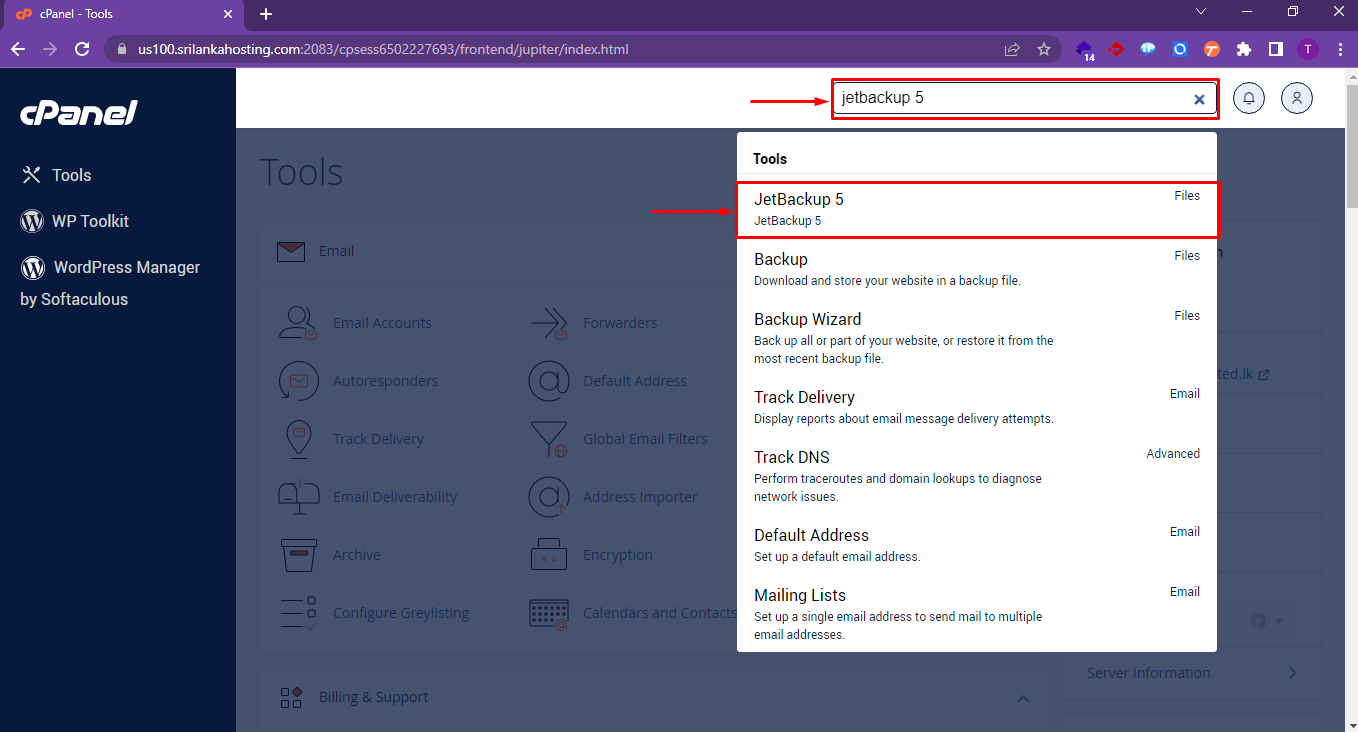
Step 1: To find JetBackup 5, log in to your cPanel account and use the search bar to search for it
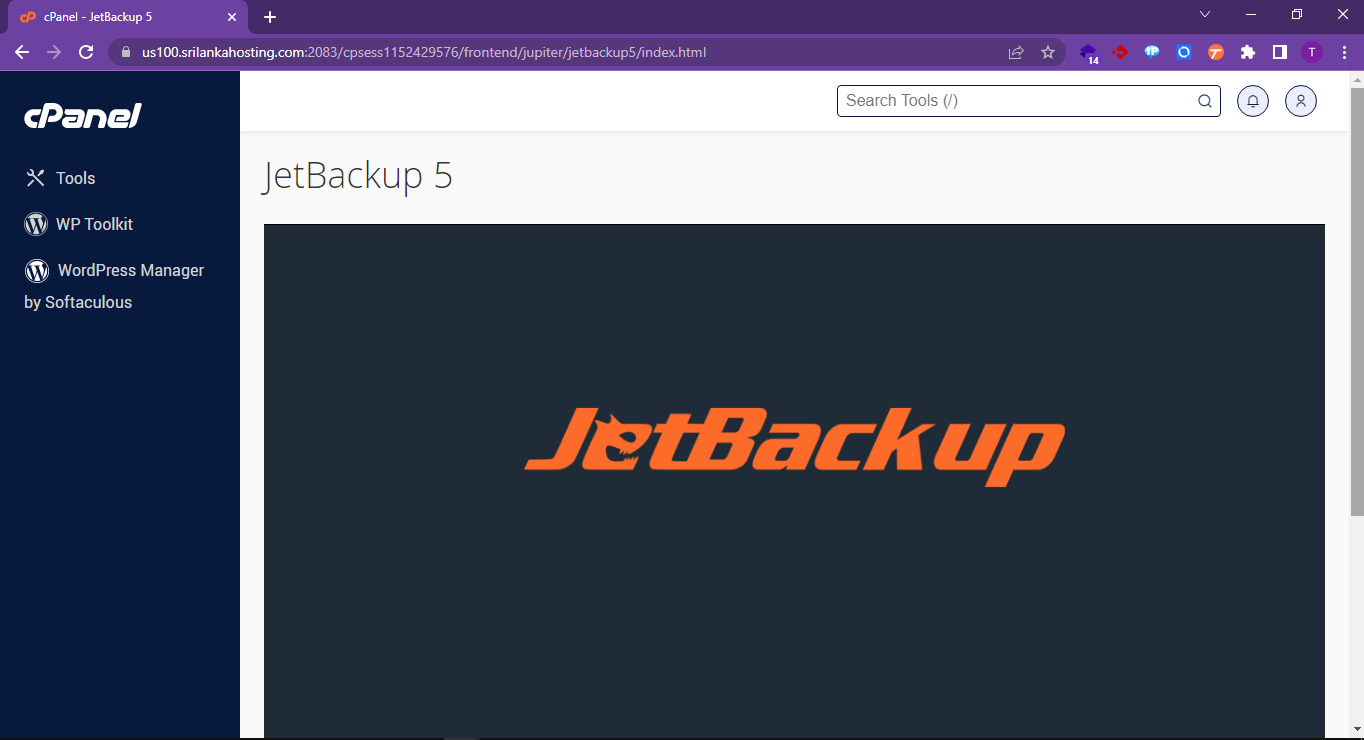
Step 2: After that, you will see the JetBackup loading page. Wait until JetBackup opens
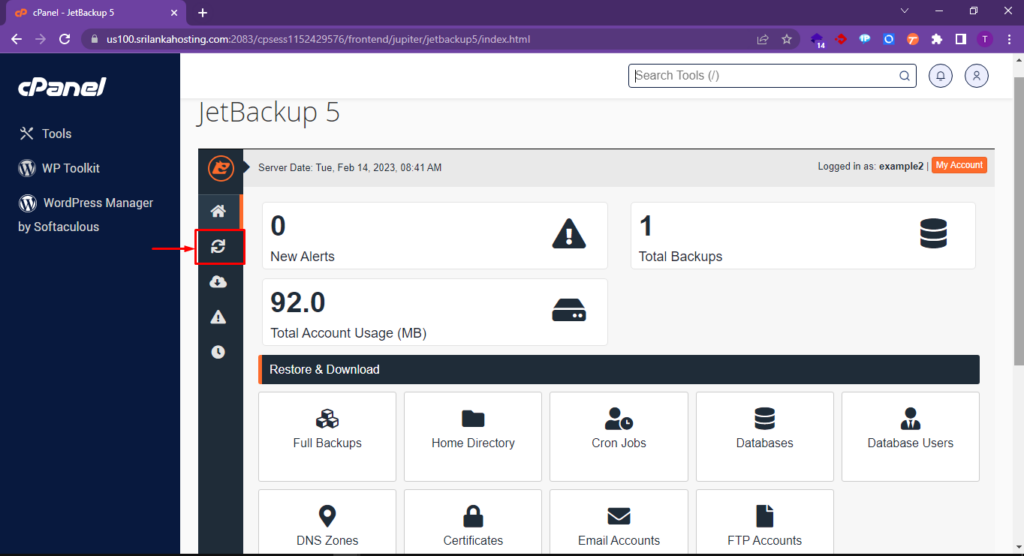
Step 3: Select Restore & Download using the method shown in the image below
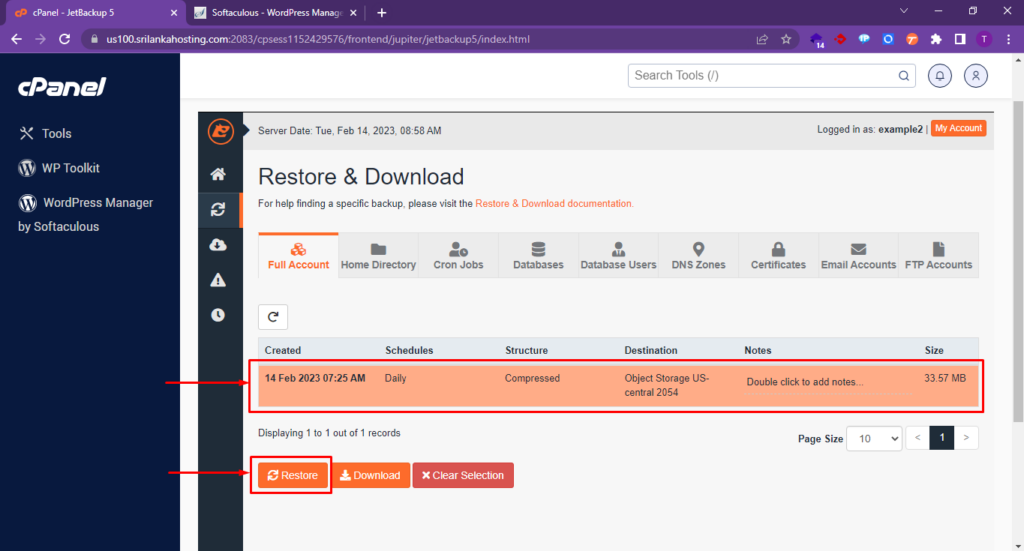
Step 4: Here, you can see your backups. Select the backup you want to restore, and then click on the Restore button
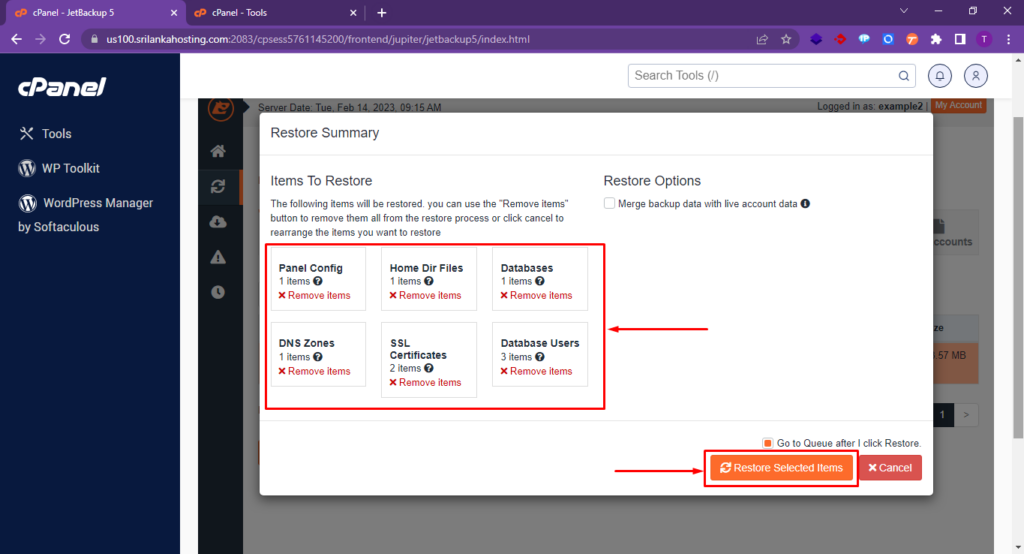
Step 5: Here, you can remove any items that you do not want to restore, and then select the Restore Selected Items button
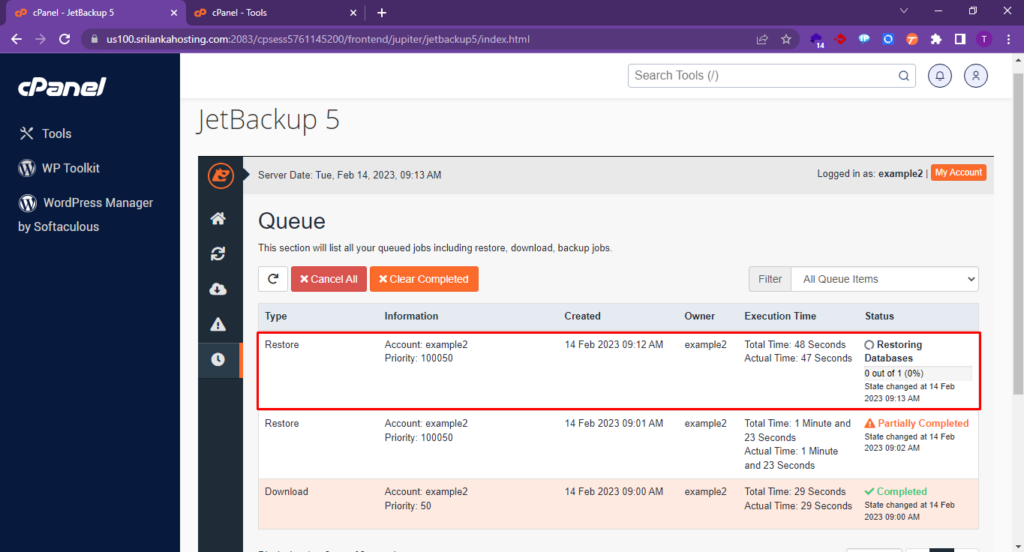
Step 6: It’s important to note that the restore process may take some time depending on the size of the backup file and the type of restore you are performing. Be patient and wait for the process to complete before attempting to access any restored data
After successfully completing a restoration using cPanel JetBackup, you should verify that the data has been restored correctly and is accessible. This may involve logging in to your website, checking your email, or accessing your databases to ensure that everything is functioning properly.
It’s always a good idea to keep regular backups of your data and test your restoration process periodically to ensure that you can quickly recover in the event of a disaster or data loss.


