
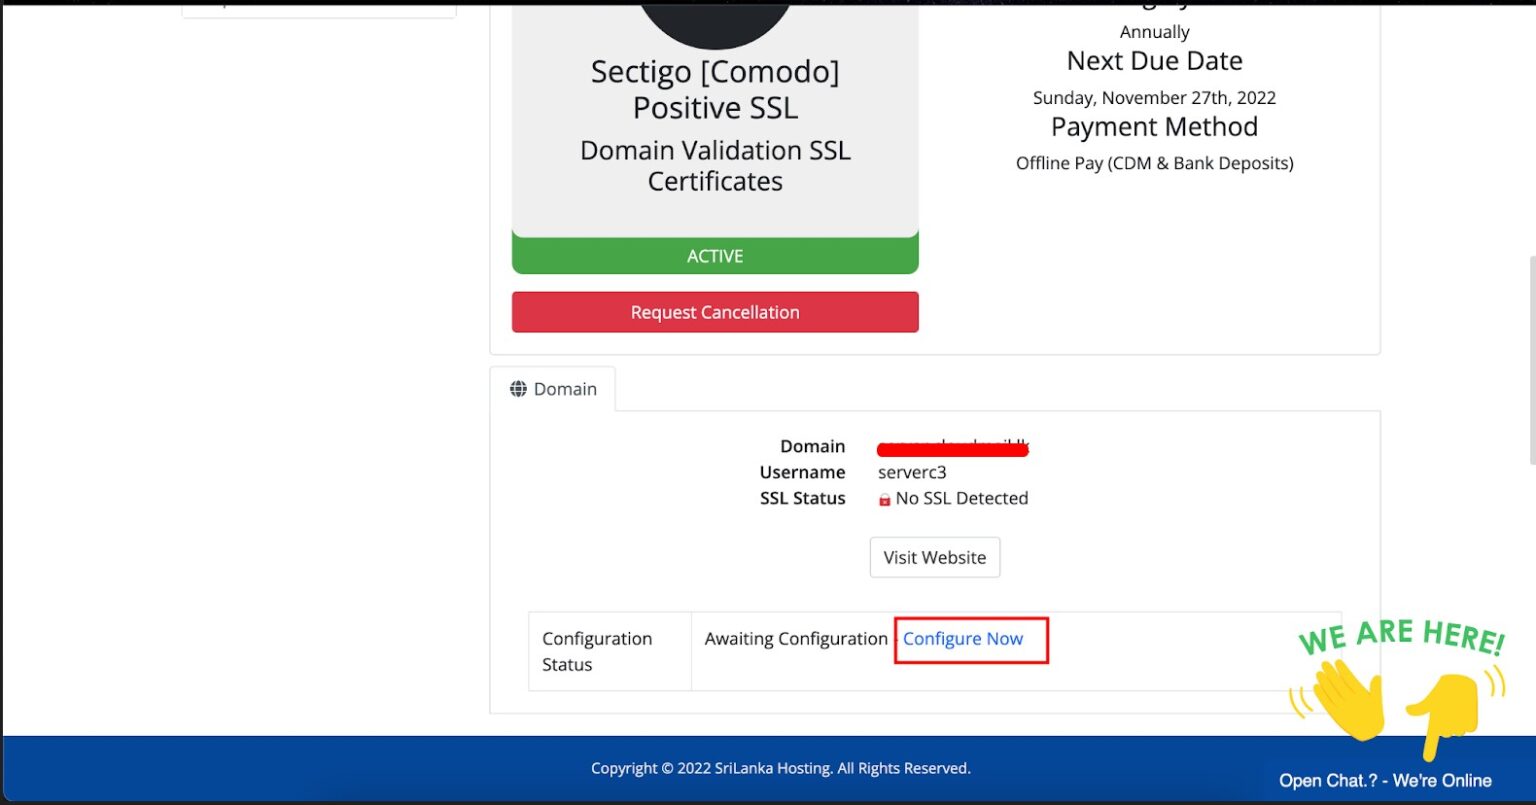
Step 1: Go to Your SSL Product
- Locate your SSL product in the client area.
- Click on the Configure Now button at the bottom of the window.
Step 2: Select Order Type
- If you’re ordering a new SSL certificate or haven’t purchased one from us before, select New Order
- If you’re renewing an existing certificate, select Renewal
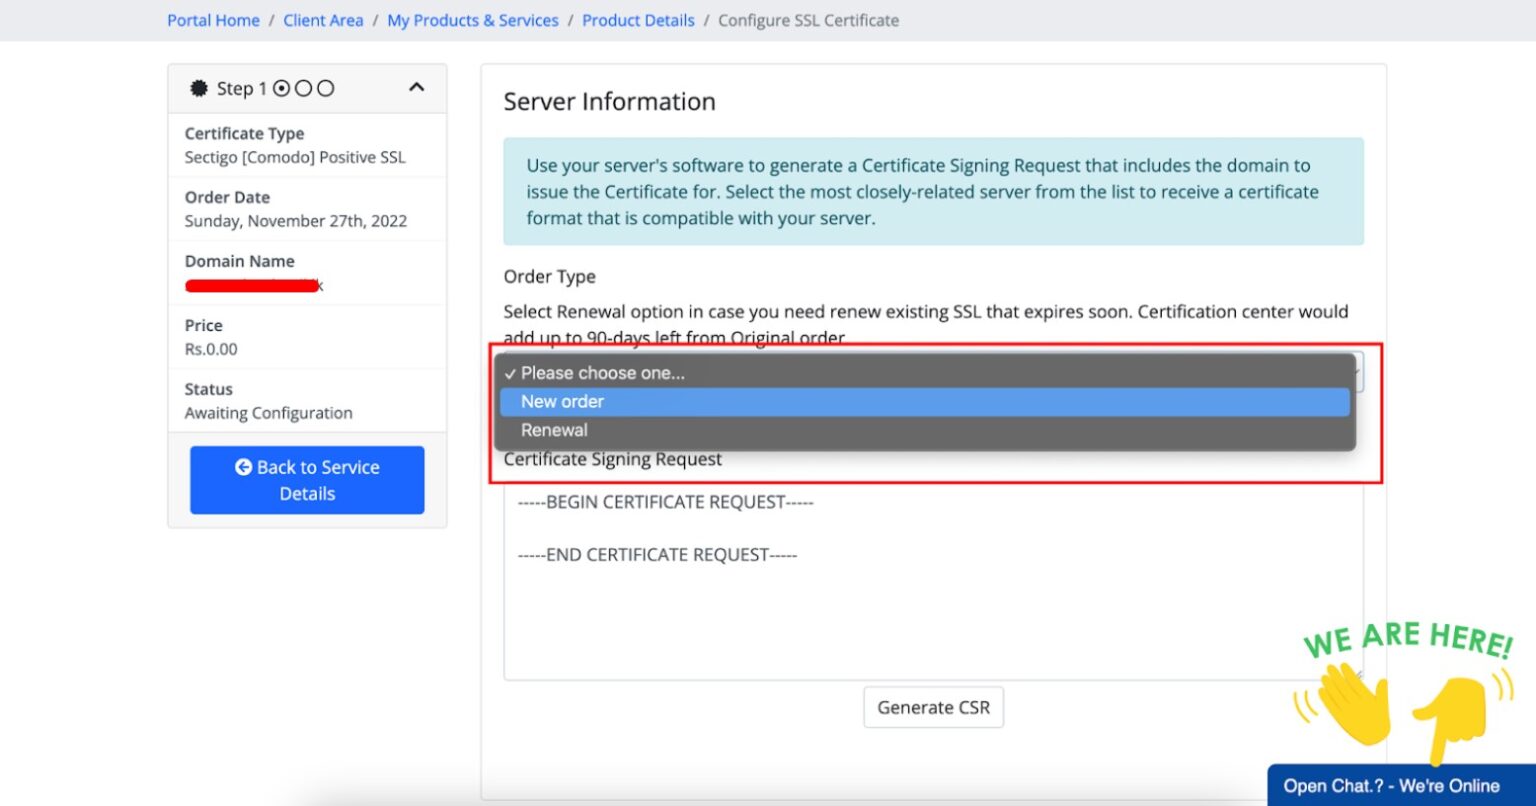
Step 3: Generate CSR (Certificate Signing Request)
Method 1 (Recommended) – Server Side
- Generate the CSR from your server.
- Copy and paste the CSR into the required field in your client area.
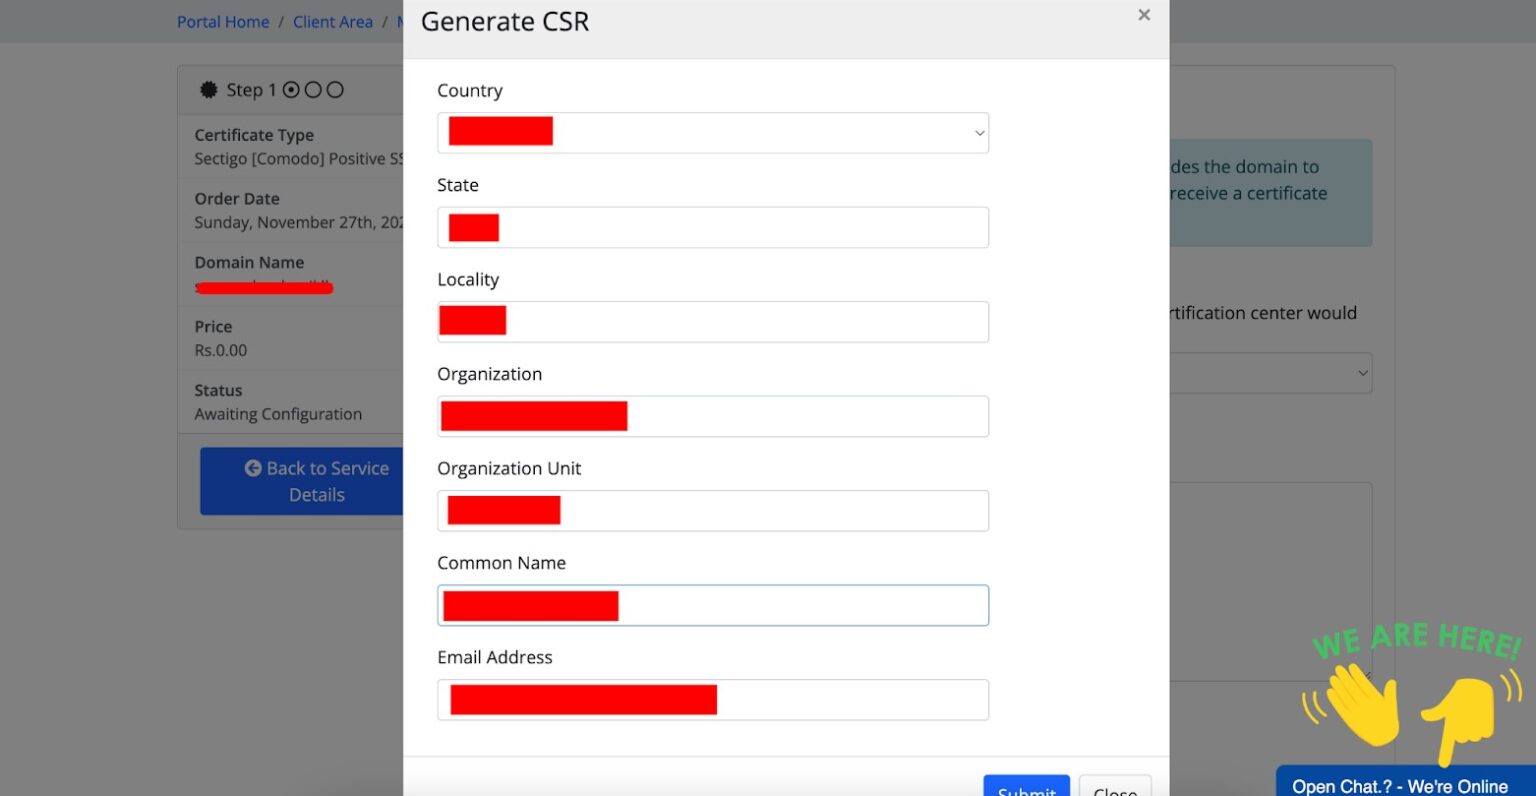
Method 2 – From Client Area
- Click Generate CSR to create the CSR and keys.
- Fill in the required form to proceed.
- After submission, the CSR details will appear in the CSR section.
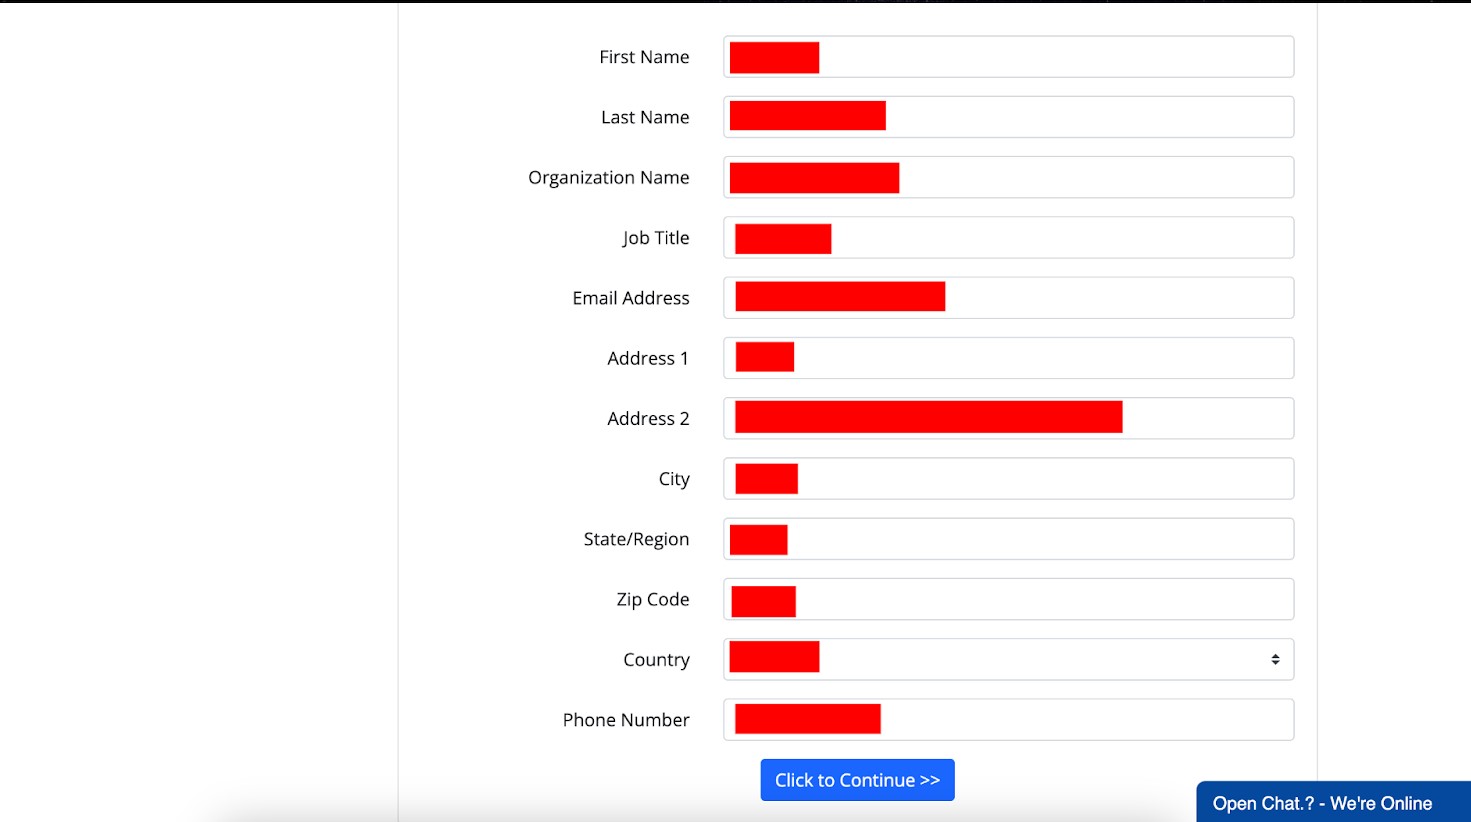
Step 4: Fill Administrative Contact Form
- Scroll down and fill in the administrative contact form with the correct details.
- Click Continue to proceed.
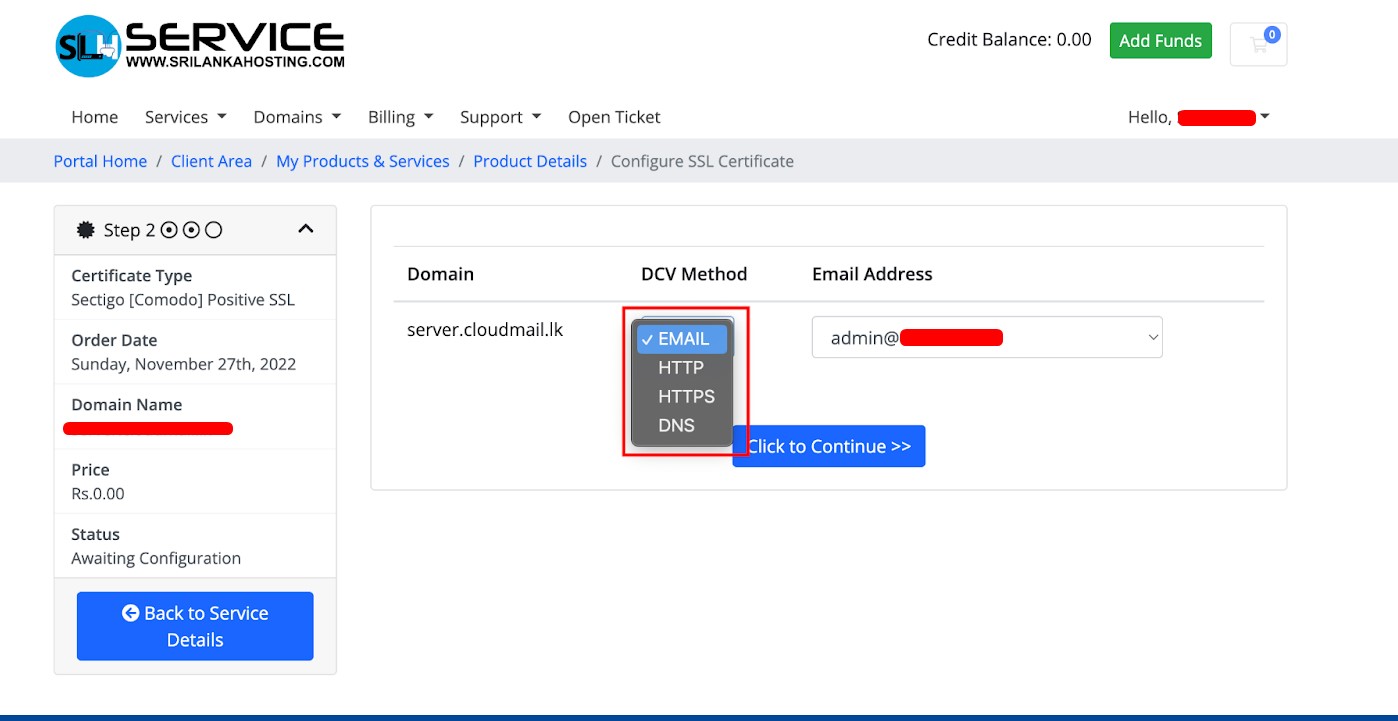
Step 5: Domain Validation
- On the next page, select a domain validation method from the available options.
- Complete the validation process and click Continue.
Steps:
1. Email Validation
- Select Email Validation during the SSL configuration.
- Choose one of the default approval email addresses. ( admin@<yourdomain>, administrator@<yourdomain>, hostmaster@<yourdomain>, webmaster@<yourdomain> and postmaster@<yourdomain>)
- An approval email will be sent to the selected address.
- Open the email and click the approval link to validate.
(Ensure the selected email address exists and is accessible before choosing this method.)
2. DNS (CNAME) Record Validation
Steps:
- Select DNS Validation during configuration.
- The CA will provide a CNAME record (name and value).
- Add the provided CNAME record to your domain’s DNS zone.
- Wait for DNS propagation ( It takes from 10 minutes and up to 24 hours to validate domain; it depends on your DNS server TTL).
- The CA automatically checks and validates your domain.
3. HTTP File Upload (File-Based Validation)
Steps:
- Select HTTP Validation.
- The CA provides a validation file and a specific path to upload it.
(e.g., http://yourdomain.com/.well-known/pki-validation) - Upload the file to your web server in the given path.
- The CA will access the URL to verify the file.
(This method requires control over the website’s root directory.)
Final Step: SSL Certificate Issuance
- Once the domain validation is successfully completed, the SSL certificate will be sent to your email.
- Alternatively, you can download it directly from your client area.


