
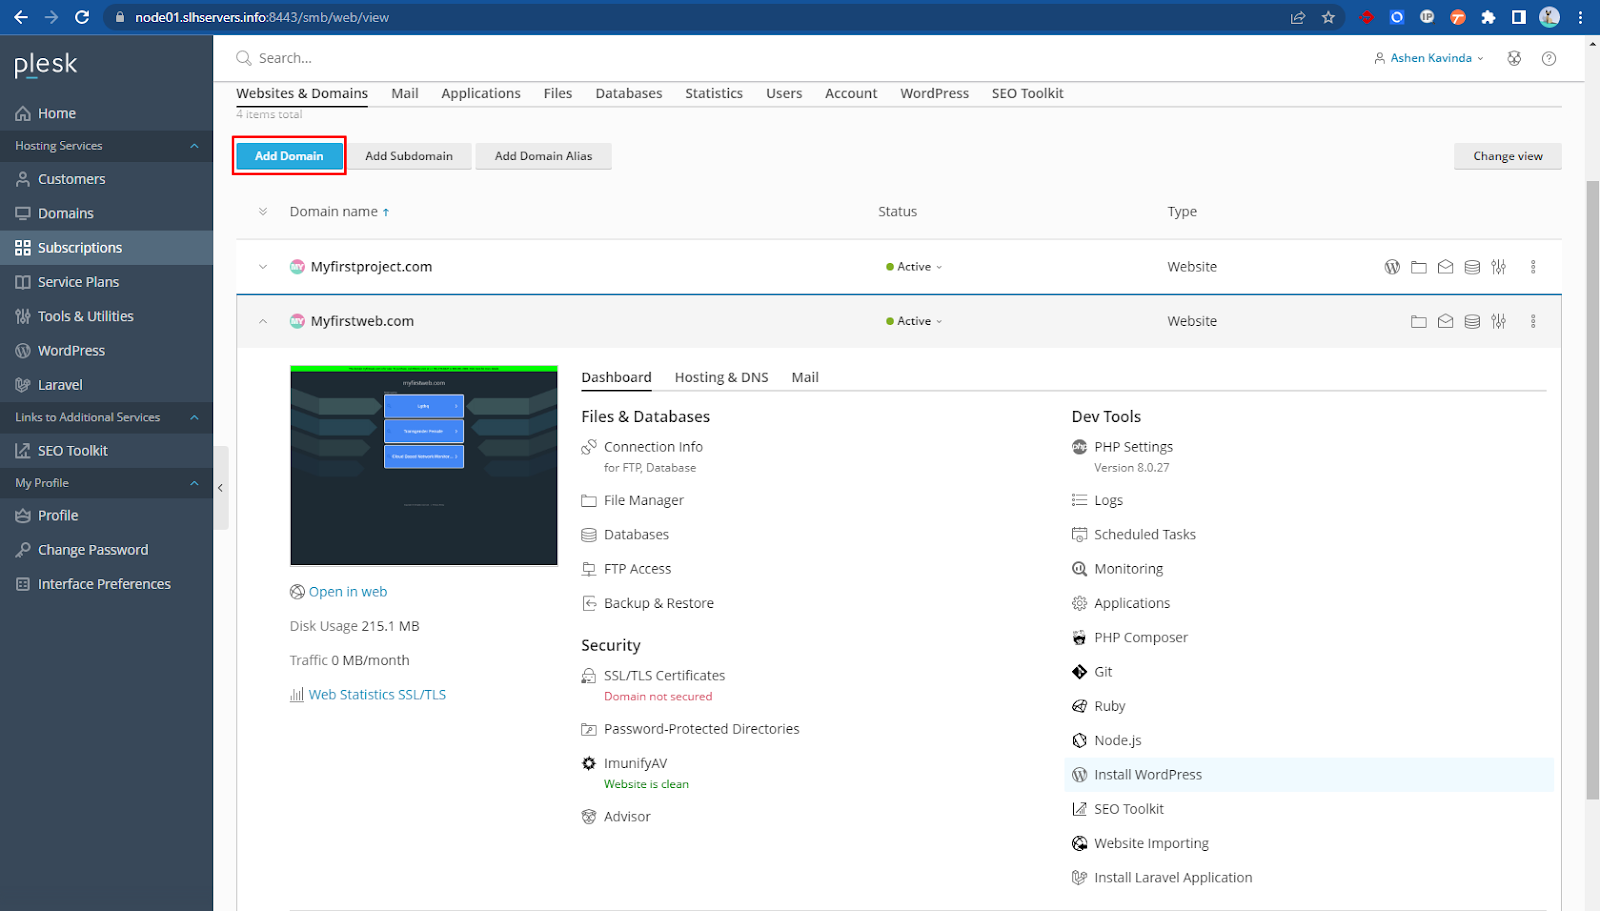
Adding Domains
If your subscription allows it, you can create multiple domains on a single subscription. The newly added domain will share the subscription’s resources with all other domains that belong to the same subscription. However, in all other respects, the newly created domain will be independent from the principal one – it will have its own web hosting and DNS settings, databases, mail accounts, and so on.
Adding a new domain can be helpful in several scenarios:
- You can create an additional website that is unrelated to any of your existing websites, complete with its own name, web content, mail accounts, etc. In this case, if you don’t already have a second-level domain name registered, you’ll need to register one for the new website. A second-level domain name includes a proper name and a top-level domain suffix (TLD), such as .com or .net. For example, example.com is a second-level domain name. You can register a domain name through your provider or purchase one from a domain registrar of your choice.
- To transfer a domain that is already hosted at a different provider, you would need to contact your domain registrar and change the authoritative name servers for the domain name of the website you want to transfer to Plesk name servers. Along with updating the name servers, you should also transfer the website content. This can be done via FTP or using a file manager as described in the uploading content section.
- You can set up a website that redirects visitors to a different website. There could be several reasons to set up such redirection, which are listed in the Adding Domain Aliases section. When redirecting a website to another, you’ll need a separate domain name for the domain alias.
- This mean that you’ll be configuring the first website to redirect to the other one using the domain alias feature and making sure you have a different domain name for each of the website.

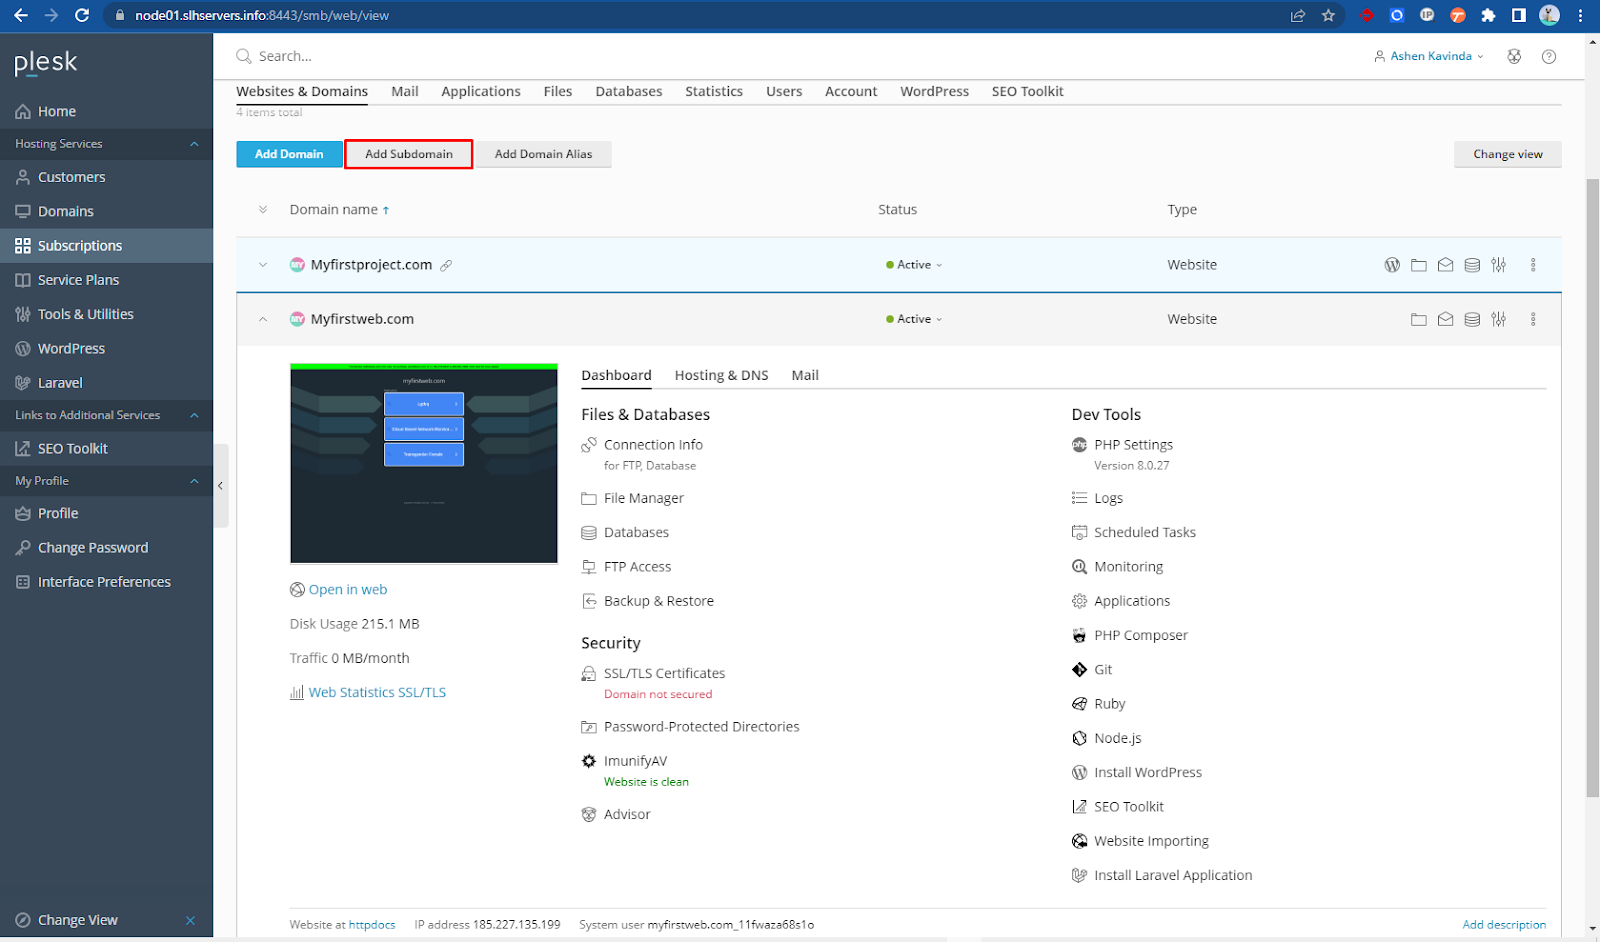
Adding Subdomains:
If your subscription permits, you can create one or multiple subdomains, or third-level domains, for each of your primary domains. All subdomains share the resources of the subscription with the other domains and subdomains belonging to the same subscription. Nevertheless, each subdomain can have its independent web hosting and DNS configurations.
Adding a new subdomain can be helpful in several scenarios:
- You can use subdomains to logically organize the structure of your website. By creating subdomains, you can easily separate different sections of your website and make them more accessible to visitors. For example, you can use the subdomain info.example.com to display information about your company and store.example.com to host your web store. This way, visitors can easily find the information they’re looking for and navigate your website more efficiently. Additionally, it can also help you manage your website more easily and make it more scalable.
- Creating subdomains can also be a useful way to host a large number of simple websites without having to purchase a separate domain name for each of them. For example, you can use subdomains to host personal websites, such as johndoe.example.com and janedoe.example.com. This allows you to have multiple websites, each with its own unique address, while still using the same main domain. This can be a cost-effective solution for hosting a large number of simple websites, as well as a way to manage them more easily.
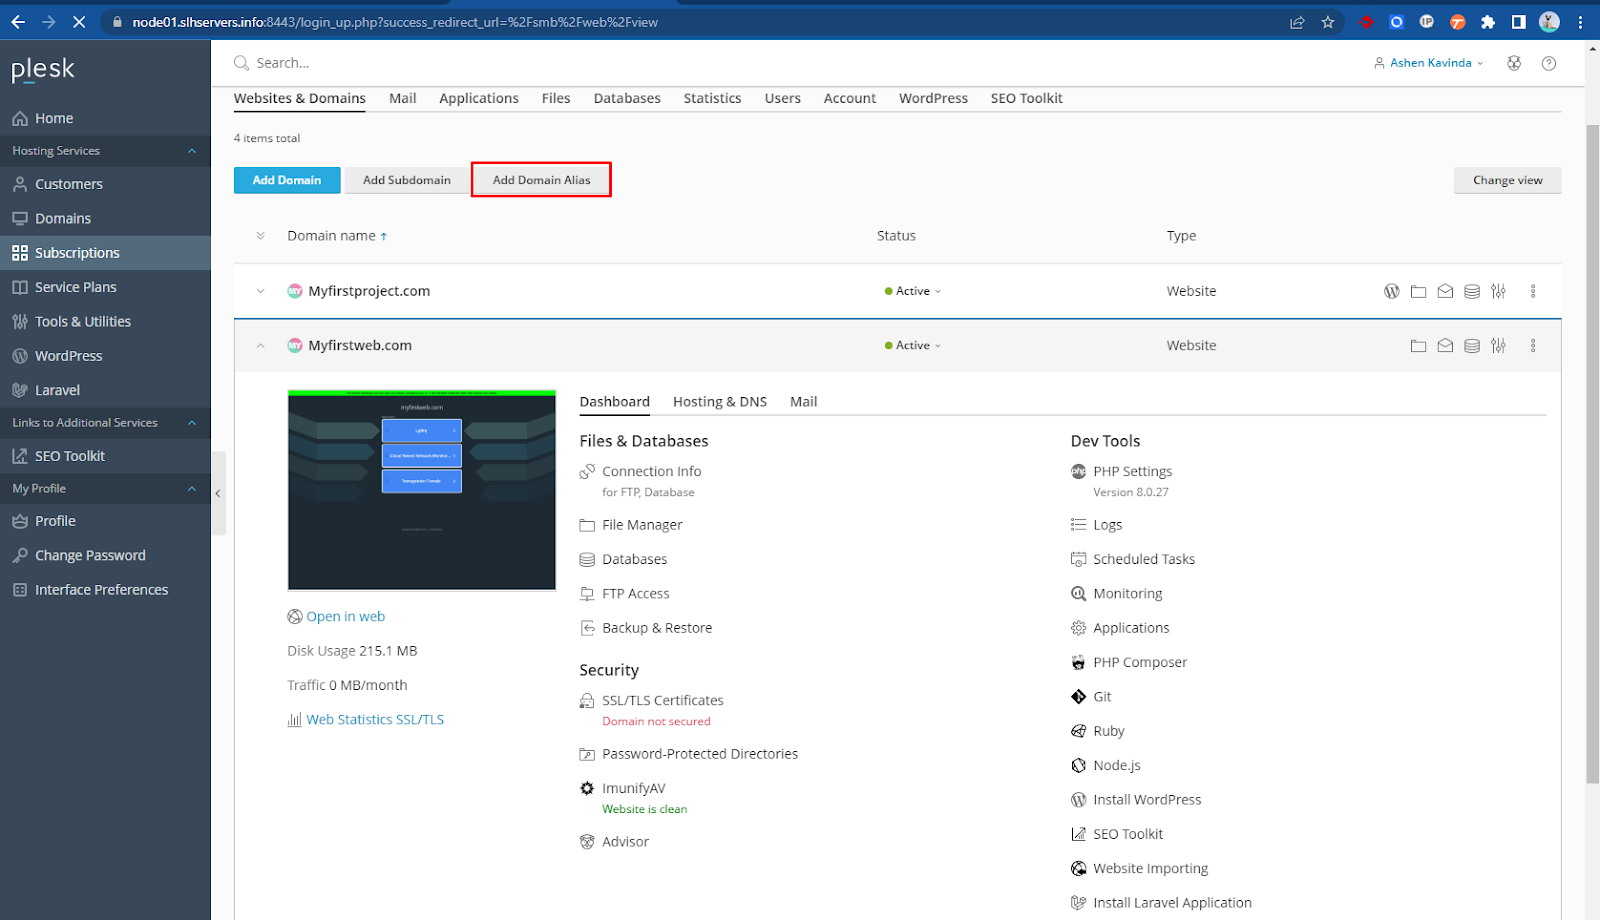
Adding Domain Aliases:
- If your subscription allows it, you can create one or more domain aliases. A domain alias is a domain that does not have its own content but instead redirects visitors to another website. Note that unless you already have another second-level domain name registered, you will need to register one for the domain alias. You can register a domain name through your provider or purchase one from a domain registrar of your choice.
- Creating domain aliases can also be useful for ensuring that visitors can find your website regardless of the TLD they use. For example, by registering example.net and example.org and using them as domain aliases pointing to your website example.com, you can ensure that visitors who type in any of those domain names will be redirected to your website.
Another use case for domain aliases is to ensure that visitors who mistype your domain name can still find your website. For example, by registering exmaple.com as a domain alias pointing to your website example.com, you can ensure that visitors who accidentally type in the incorrect domain name will still be directed to your website.
Another advantage of using domain aliases is the ability to change your domain name. For example, if you want to change the domain name of your website from example.com to anotherexample.com, you can configure the example.com name to be a domain alias pointing to your new website anotherexample.com. This way, visitors who still have the old domain name will be redirected to the new one. - In all these cases, domain aliases help in redirecting visitors to the correct website by providing alternate domain names, thus increasing the chances of visitors finding the website they are looking for.
To add a new domain alias, Go to Websites & Domains -> Add Domain Alias.
Setting Up Custom Error Pages:
When a web server encounters an error that prevents it from displaying the requested page of a website, it displays a special error page along with the relevant error code. By default, these pages are often generic and may not provide enough information. However, it is possible to replace the standard error pages with custom ones.
Setting Up Custom Error Pages on Linux
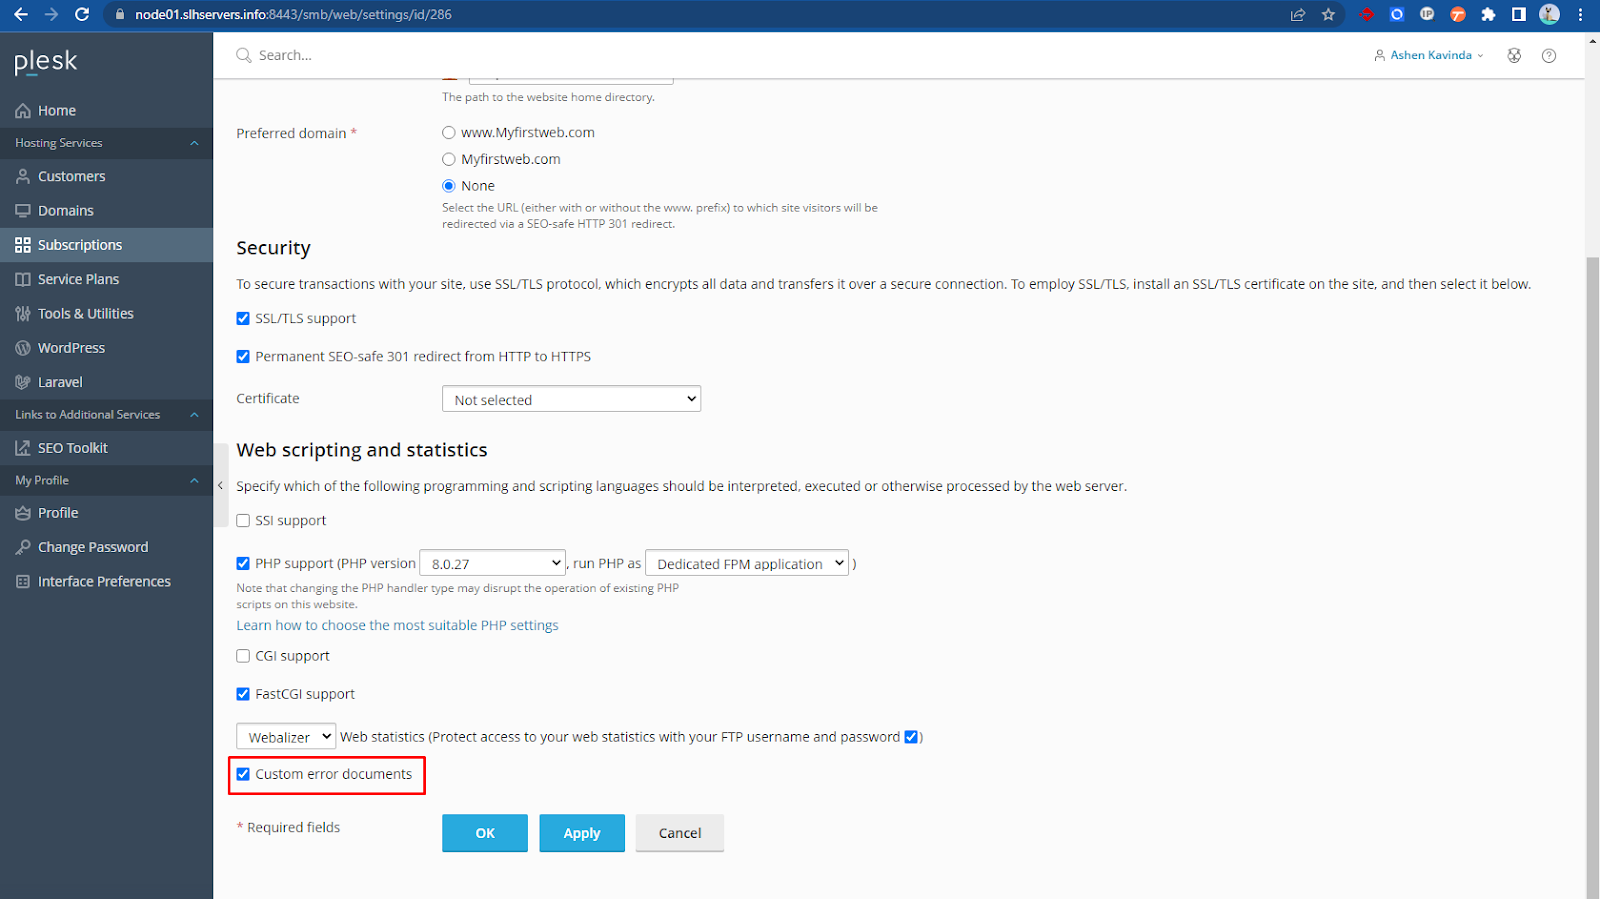
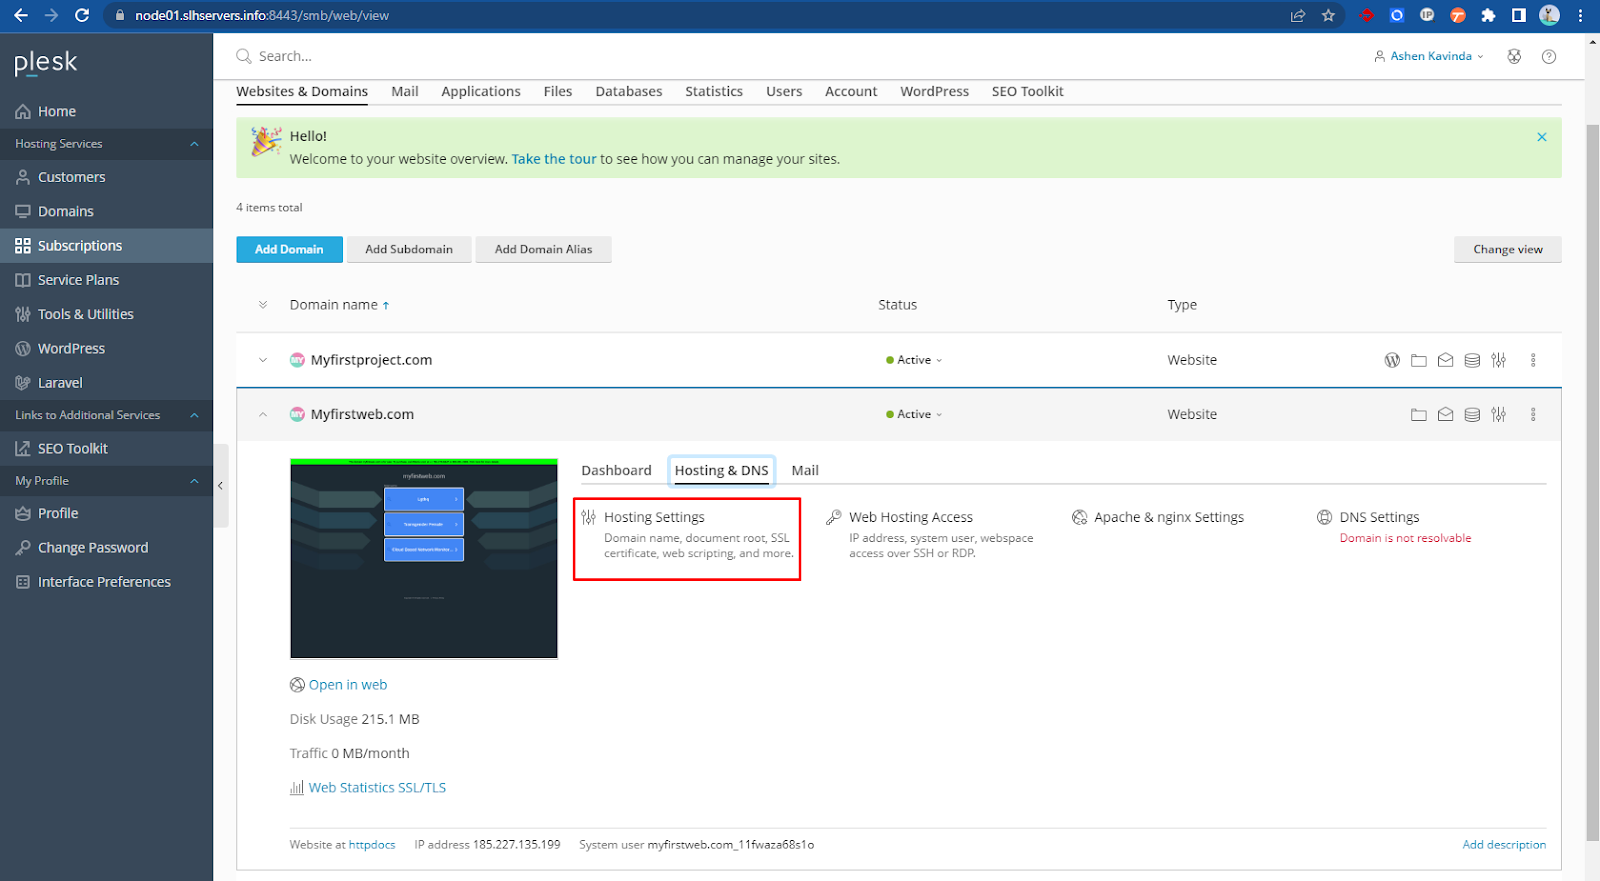
- Go to Websites & Domains -> Hosting Settings.
- Select the Custom error documents checkbox and click OK.

- Connect to your FTP account, and go to the error_docs directory.
- Edit or replace the respective files. Be sure to preserve the correct file names:
400 Bad File Request – bad_request.html
401 Unauthorized – unauthorized.html
403 Forbidden/Access denied – forbidden.html
404 Not Found – not_found.html
405 Method Not Allowed – method_not_allowed.html
406 Not Acceptable – not_acceptable.html
407 Proxy Authentication Required – proxy_authentication_required.html
412 Precondition Failed – precondition_failed.html
414 Request-URI Too Long – request-uri_too_long.html
415 Unsupported Media Type – unsupported_media_type.html
500 Internal Server Error – internal_server_error.html
501 Not Implemented – not_implemented.html
502 Bad Gateway – bad_gateway.html
503 Service Temporarily Unavailable – maintenance.html
The web server will start using your error documents after it is restarted.
Setting Up Custom Error Pages on Windows:
- Go to Websites & Domains -> Hosting Settings.
Select the Custom error documents checkbox and click OK.
- To customize error pages for a website, navigate to the Virtual Directories and open the Error Documents tab. The list of error documents for the root web directory will be displayed. These are used for all web pages of the selected site. If you wish to customize error pages for a specific virtual directory, first navigate to that directory.
- Click the error document you want to change. The following options are available:
To use the default error page provided by IIS, select Default from the Type menu.
To specify a custom HTML document located in the error_docs directory located within the virtual host directory of the domain, select File from the Type menu and enter the file name in the Location field.
To use a custom HTML document located in a directory other than error_docs, select URL from the Type menu and enter the path to your document in the Location field. The path must be relative to the virtual host root (that is, the %plesk_vhosts%\<domain_name>\httpdocs folder).
For example, you have created a file named forbidden_403_1.html and saved it in the my_errors directory located in the httpdocs directory. To use this file as an error document, you need to type the following path into the Location field: /my_errors/forbidden_403_1.html.
Note: You can use FTP or File Manager in Plesk to upload your custom error document to the server. By default, all error documents are stored in the %plesk_vhosts%\<domain_name>\error_docs\ directory.
The web server will start using your error documents after it is restarted.
Setting Up HTTP 301 Redirection:
Plesk offers two methods for creating search engine-friendly HTTP 301 redirections from one website to another, which helps maintain the search engine rankings of the redirected website. For instance, if you establish an HTTP 301 redirection from example.com to www.example.com, search engines will consider both the www and non-www versions as the same site. In contrast, if you use HTTP 302 redirection, search engines will perceive the www and non-www versions as separate sites, resulting in divided rankings.
To set up HTTP 301 redirection using domain aliases, Go to Websites & Domains -> Add Domain Alias.

To set up HTTP 301 redirection using forwarding hosting type, Go to Websites & Domains -> Add Domain.
Configuring the Preferred Domain:
As a rule, any website is available using both a URL with a www prefix (such as www.example.com) and one without it (such as example.com). We recommend that you pick one and always redirect visitors from the other. Typically, the non-www version is chosen to accept all visitors. As an example, if you configure the non-www version (example.com) as the preferred domain, a visitor will be redirected to example.com even if they type www.example.com in their browser address bar.
To configure or disable the preferred domain, Go to Websites & Domains -> Hosting Settings.
Plesk employs the search engine-friendly HTTP 301 code for redirections, which helps maintain the search engine rankings of your preferred domain. If you turn off the redirection, search engines will consider the www and non-www versions of your site as separate entities, resulting in divided rankings.
Setting the Default Homepage:
To change the default index page in Plesk for Linux:
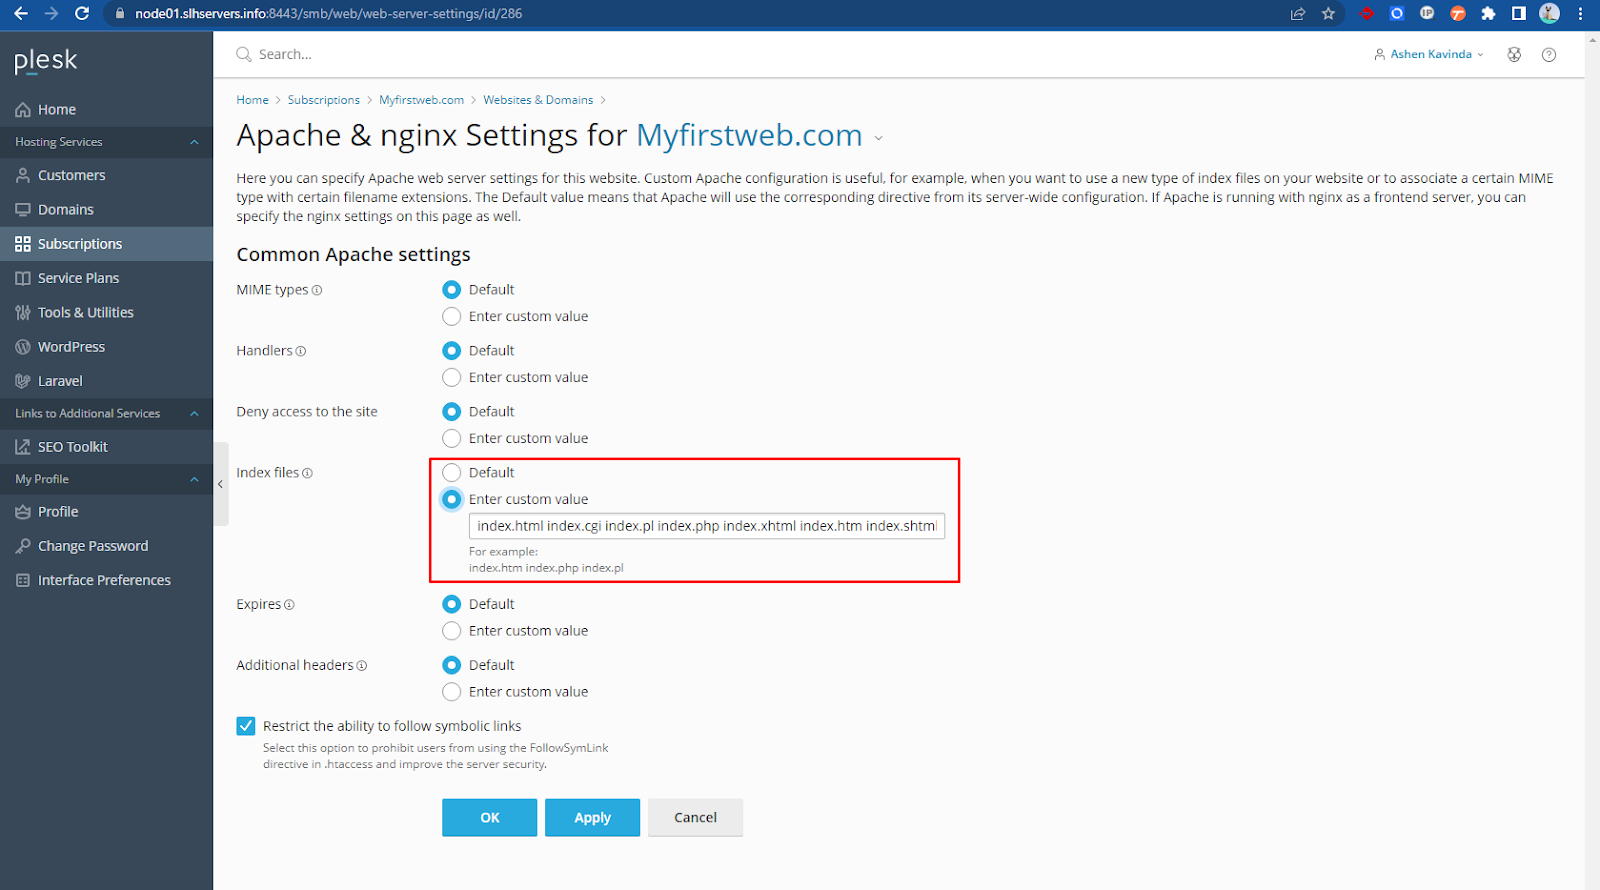
Go to Websites & Domains -> Apache & Nginx Settings.

In the Index files section, choose the Enter custom value option. Enter the file name(s) that you want to use as the default page. You can enter multiple file names separated by spaces. For instance, if you enter index.htm index.php, the web server will first attempt to serve index.html as the default page. If that file is not found, it will then serve index.php.
Changing the Document Root Directory:
By default, every domain created in Plesk with website hosting has its own directory created on the server’s file system, and the path to the directory is as follows:
- On Linux: /var/www/vhosts/<domain_name>
- On Windows: C:\Inetpub\vhosts\<domain_name>
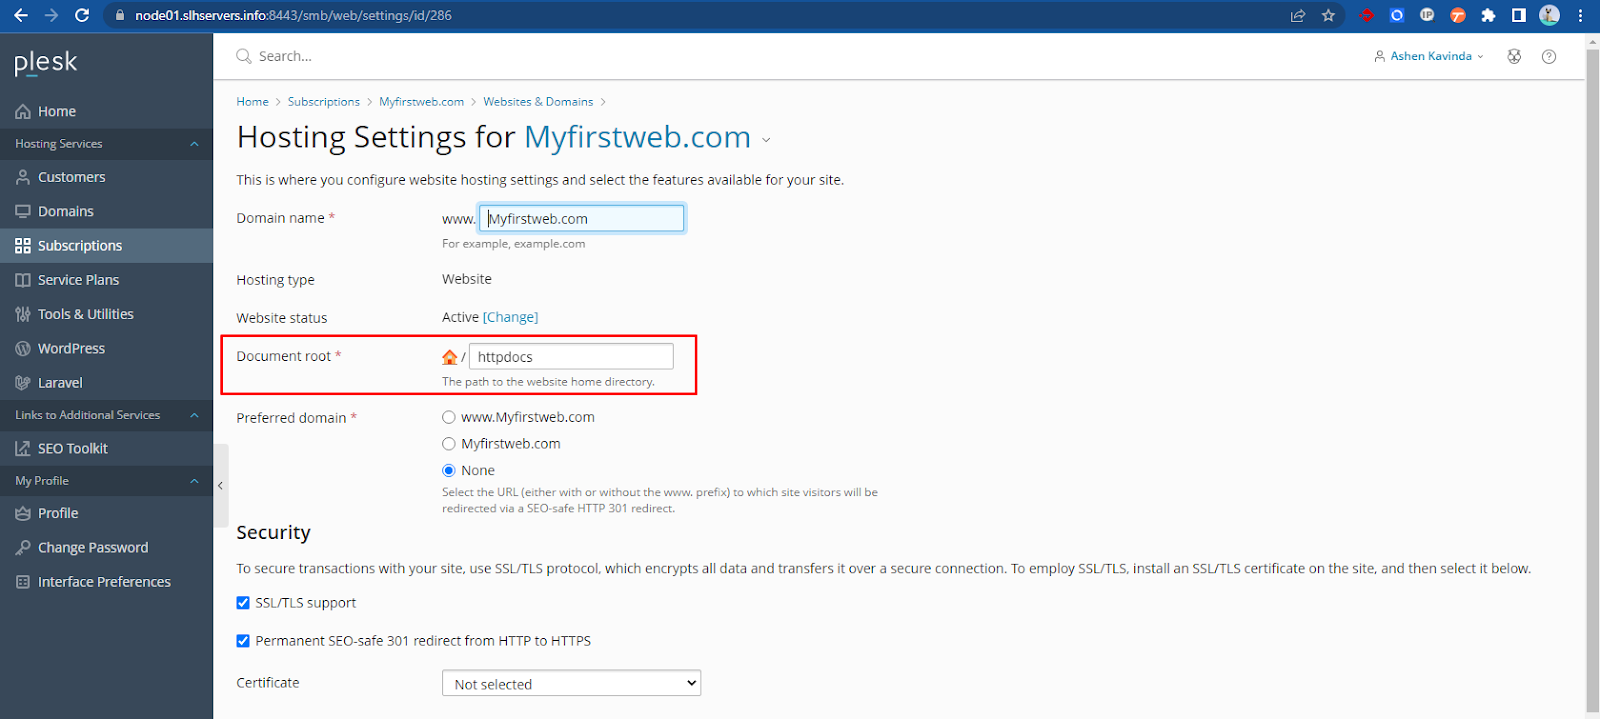
This folder contains the document root directory, that is, the folder where all the domain’s web content is stored. By default it is the httpdocs folder, but it can be changed in Plesk.
To change the document root directory, Go to Websites & Domains -> Hosting Settings and change the directory name in the Document root field.
Selecting PHP Version:
To change PHP settings, go to Websites & Domains -> PHP Settings.


