1. Add Secondary SiteWorx User
- Login to SiteWorx
- Go to Navigation Sidebar -> Administration -> Find User Accounts.
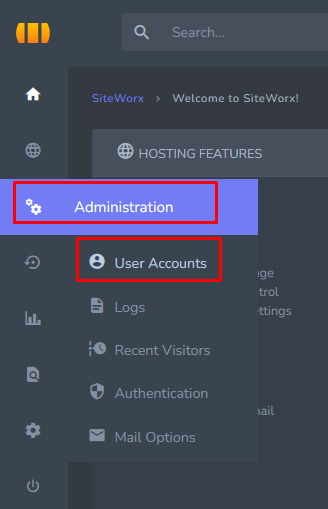
- Click the + button

- Now open the Add SiteWorx user form.
- Fill in the information given in the form correctly.
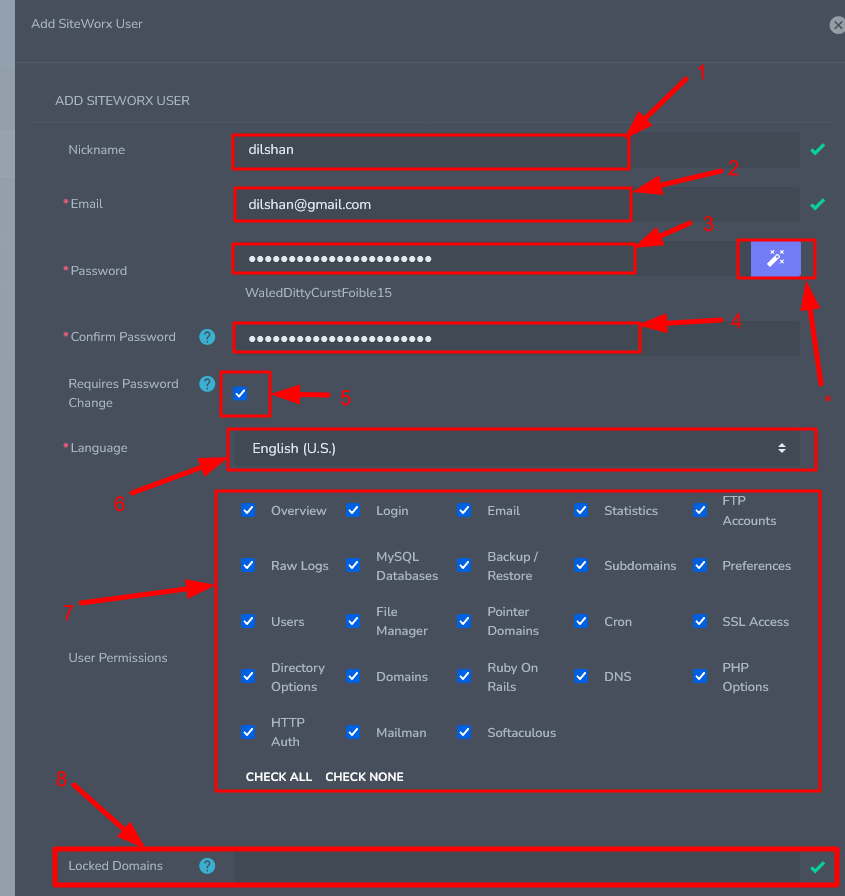
- Nickname: Type the nickname for the new Nickname section.
- Email: The email address for the new user must be entered. This acts as the user’s SiteWorx login.
- Password: Here you need to type a password for the user account.
- Confirm Password: The password entered in the Password section above must also be entered correctly in this section. (* Magic Wand: With this button you can create a password from the system)
- Requires Password Change: If this is marked, the user will be forced to change his password when he first logs in through the browser.
- Language: In this section you will need to select the username.
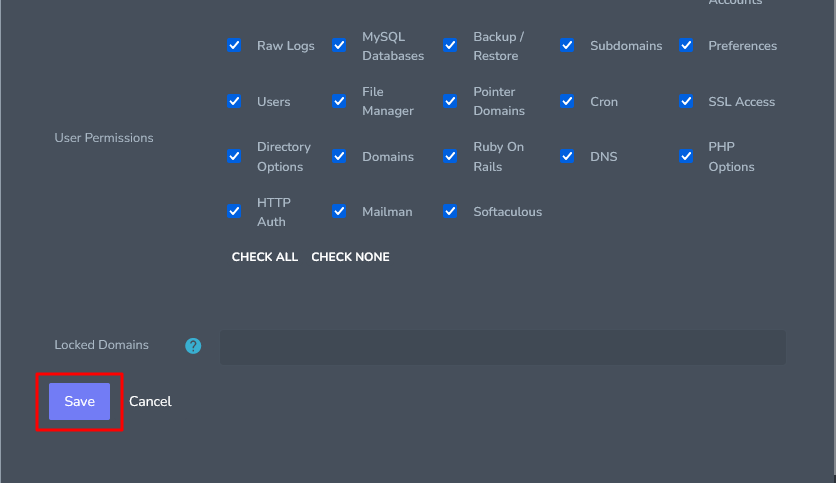
- User Permission: This section shows the marking of the permissions assigned to the user. Click the CHECK ALL button to mark full privileges.
- Locked Domains: Users may be locked to a subset of domains. This field is a comma separated list of domains, and may additionally use the negation operator (!) and the wildcard (*)
- SSH Enabled: This section allows you to determine if the user has SSH access.
- Finally, after entering all the information, you can create a user account by clicking the Save button.
2.Edit SiteWorx User
- Login to SiteWorx
- Go to Navigation Sidebar -> Administration -> Find User Accounts.
- Select the user account and click the Pencil Mark button.

- Then make the changes in the form and click the Save button.
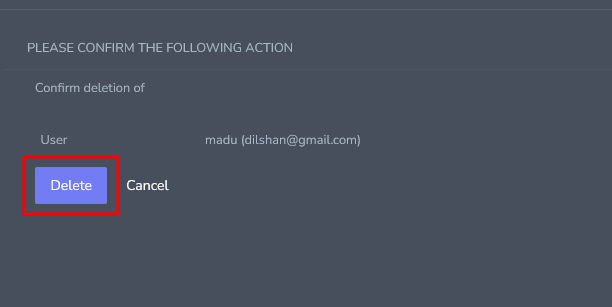
3.Delete SiteWorx User account
- Login to SiteWorx
- Go to Navigation Sidebar -> Administration -> Find User Accounts
- Select the user account and click the Delete Mark button.

- The confirmation form will now open.
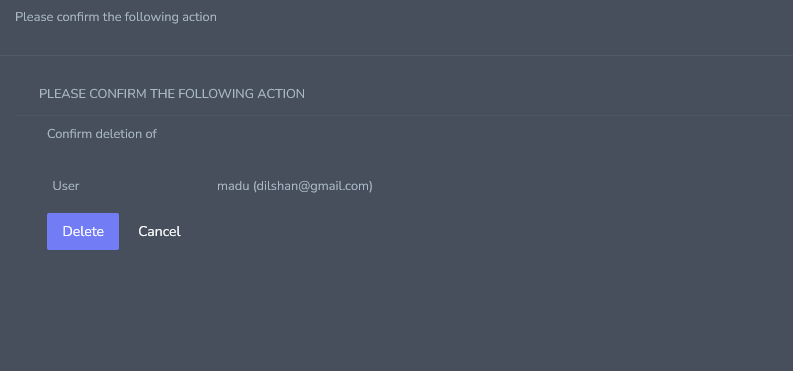
- Finally you can delete the user account by clicking the Delete button.