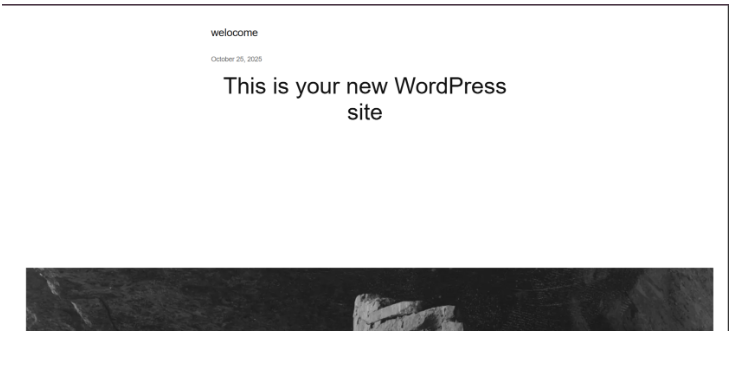
Step 1: Make sure your WordPress project runs on localhost perfectly
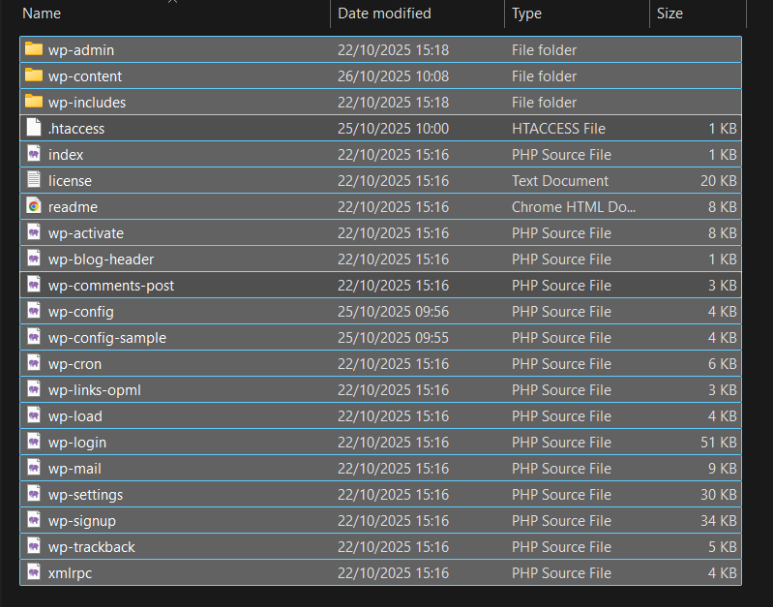
Step 2: Preparing Files for Upload
- Locate your local WordPress installation folder.
- Compress all the WordPress files and folders into a .zip archive.
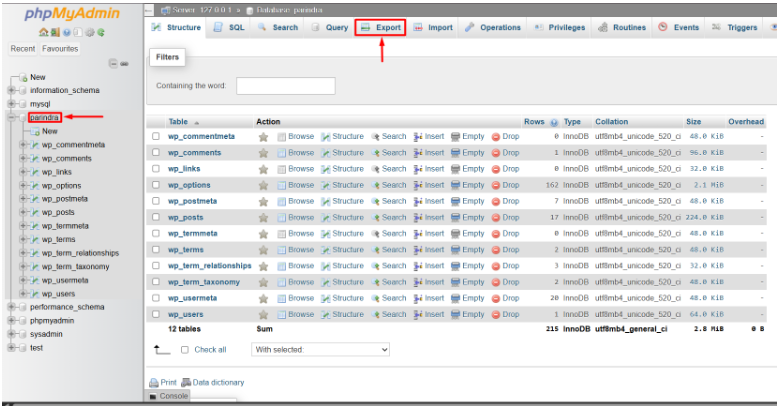
Step 3: Exporting the Local WordPress Database
- Access your local phpMyAdmin (usually via http://localhost/phpmyadmin)
- Select the database associated with your WordPress site.
- Click on the Export tab.
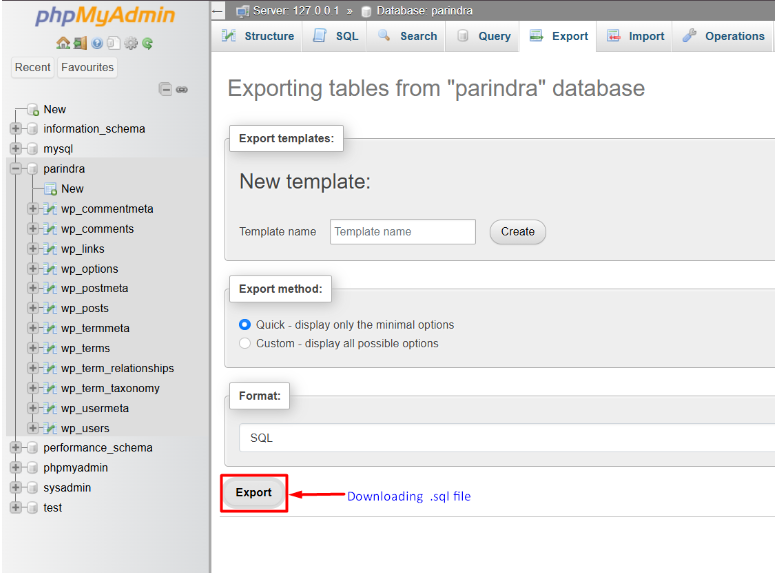
- Choose the Custom export method for more control, or Quick for a basic export.
- Ensure the format is SQL and click Go to download the .sql file.
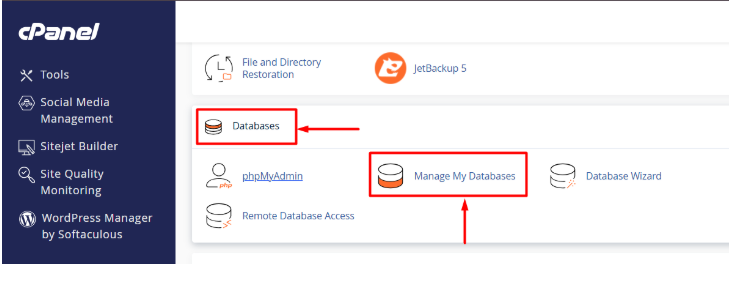
Step 4: Create a Database and Database User
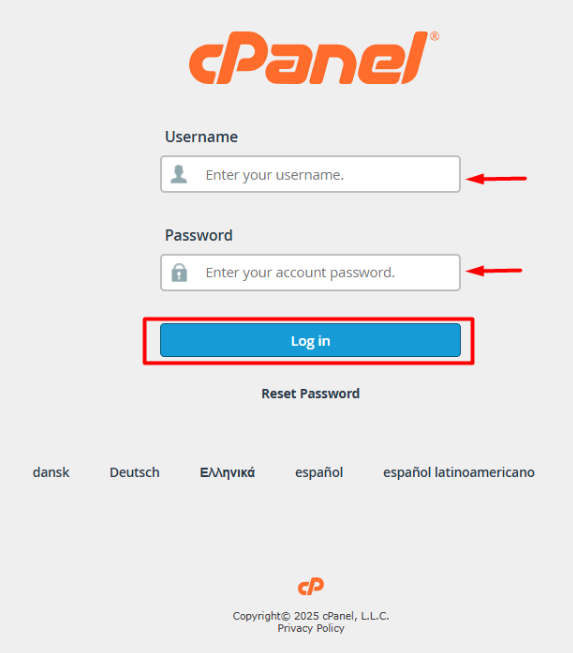
- Log in to your cPanel account.
- Navigate to Manage My Databases under the Databases section.
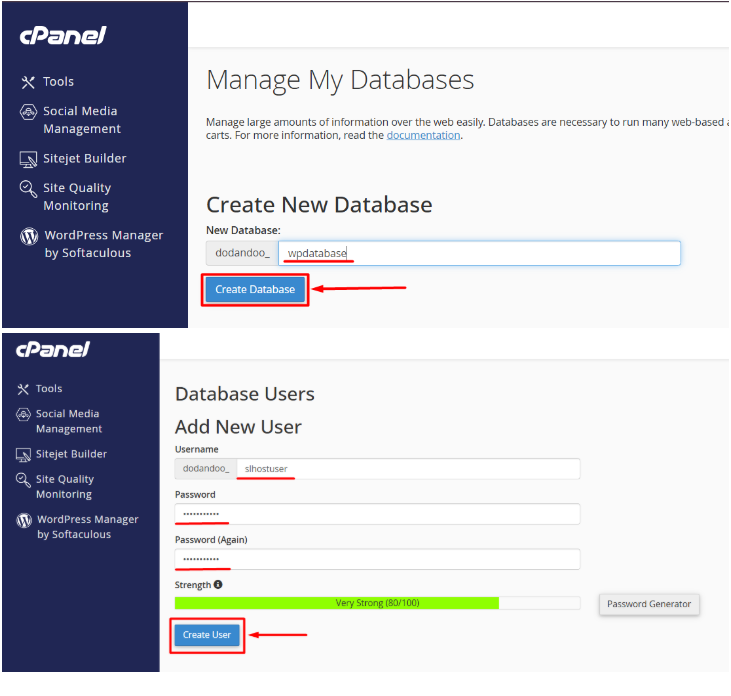
Create a New Database User
- Scroll down to Database Users.
- Click Add New User.
- Enter a username and a strong, secure password (you can use cPanel’s password generator). Make sure to note down the database name, username, and password.
- Click Create User.
Step 5: Give the User Access to the Database
- Under Add User to Database, choose the user and the database you just created.
- Click Add.
- On the next screen, select ALL PRIVILEGES — this gives your Laravel app full control over the database.
- Click Make Changes to save.
.png)
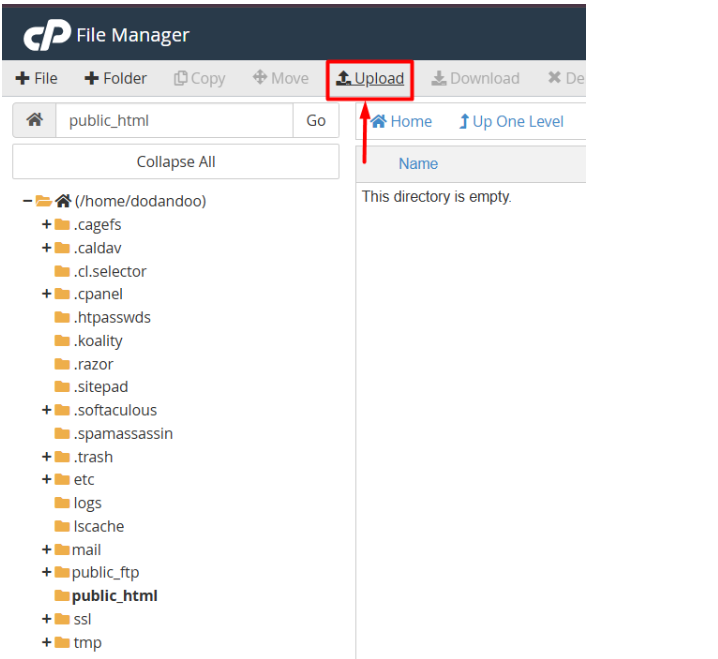
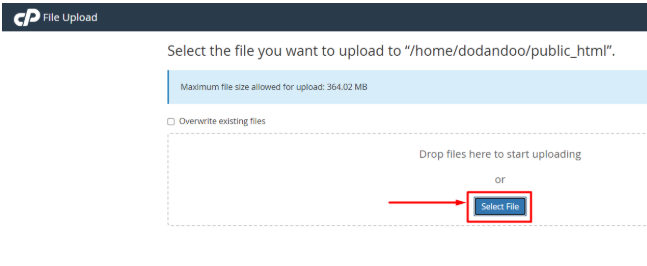
Step 6: Upload and extract WordPress Files
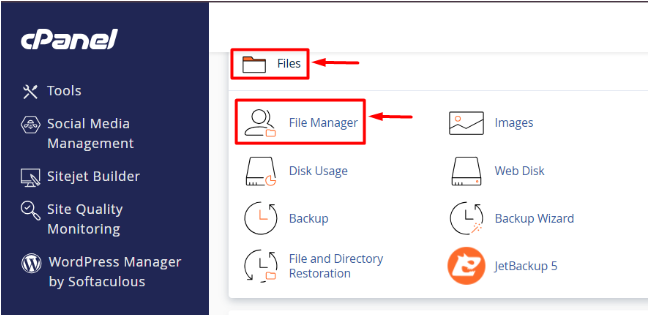
- Access cPanel’s File Manager.
- Navigate to the public_html directory.
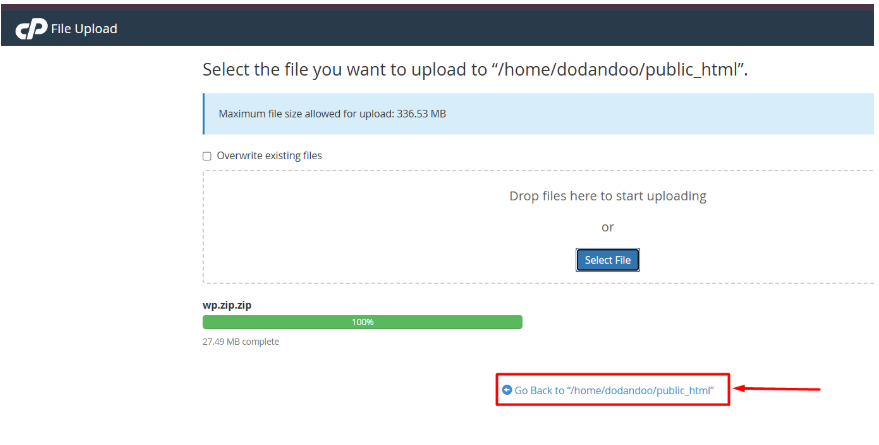
- Upload the compressed WordPress .zip file.
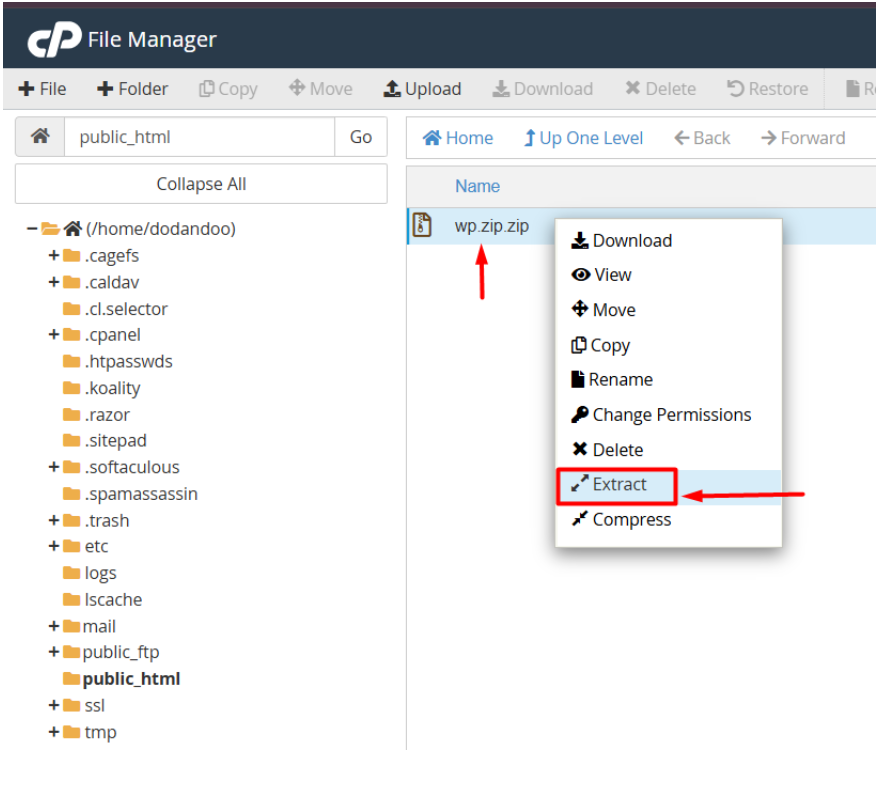
- After completing the upload, go back to the public_html File.
- Extract the contents of the .zip file into the public_html file.
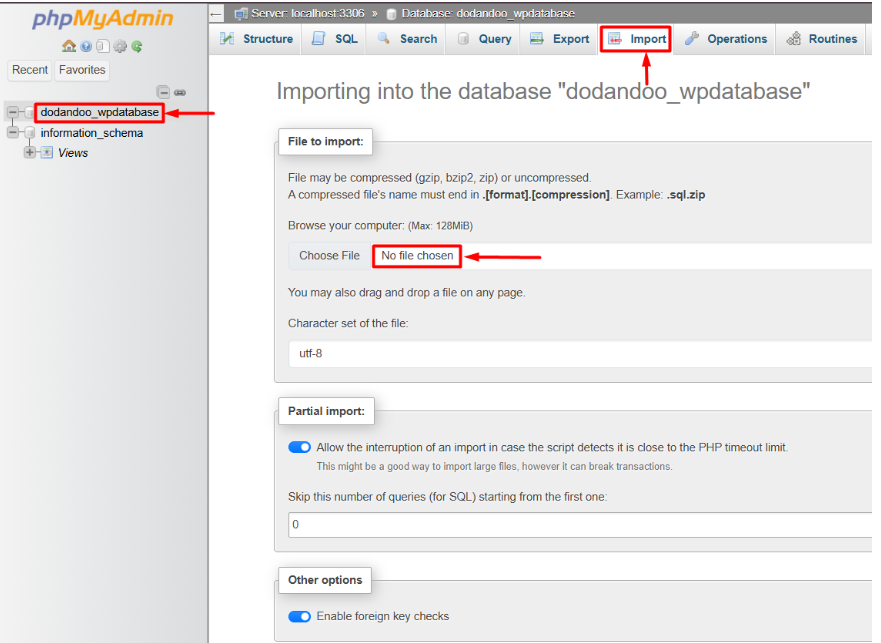
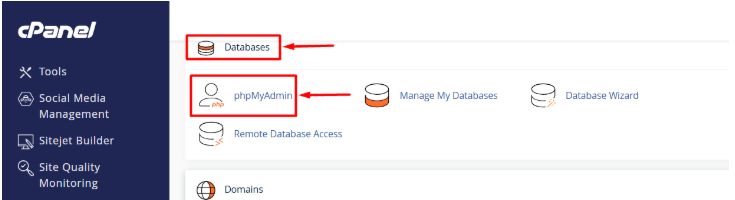
Step 7: Importing the Database
- In cPanel, go to phpMyAdmin under the Databases section.
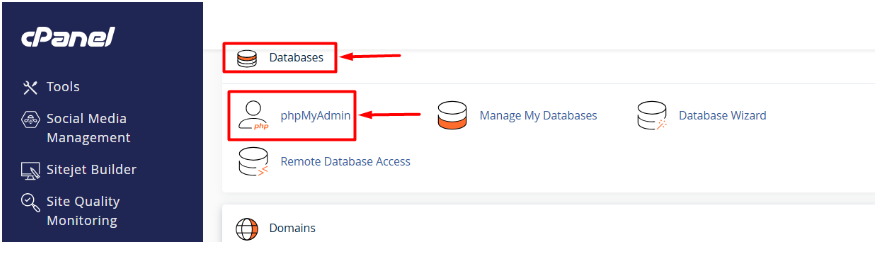
- Select the newly created database.
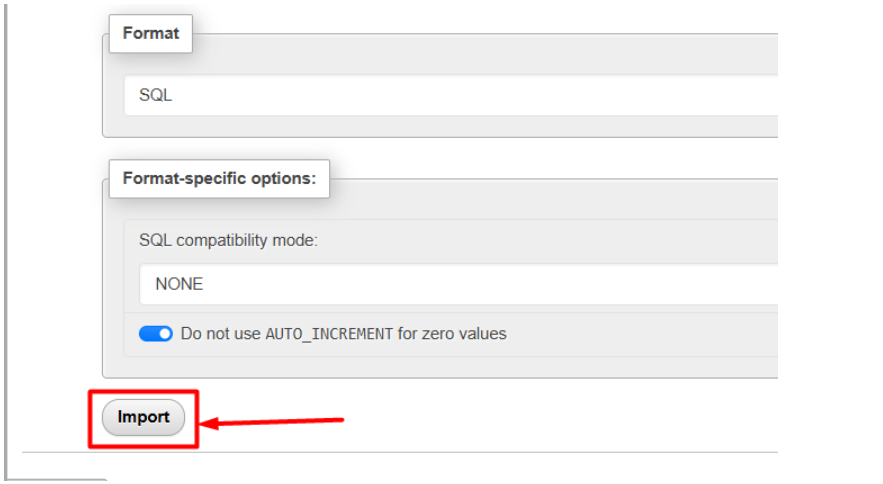
- Click on the Import tab.
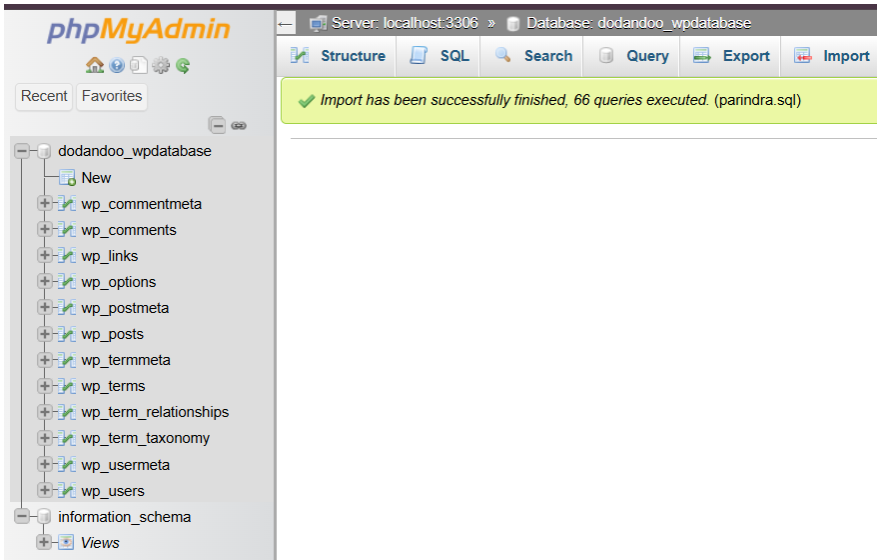
- Choose the .sql file you exported from your localhost and click Go to import.
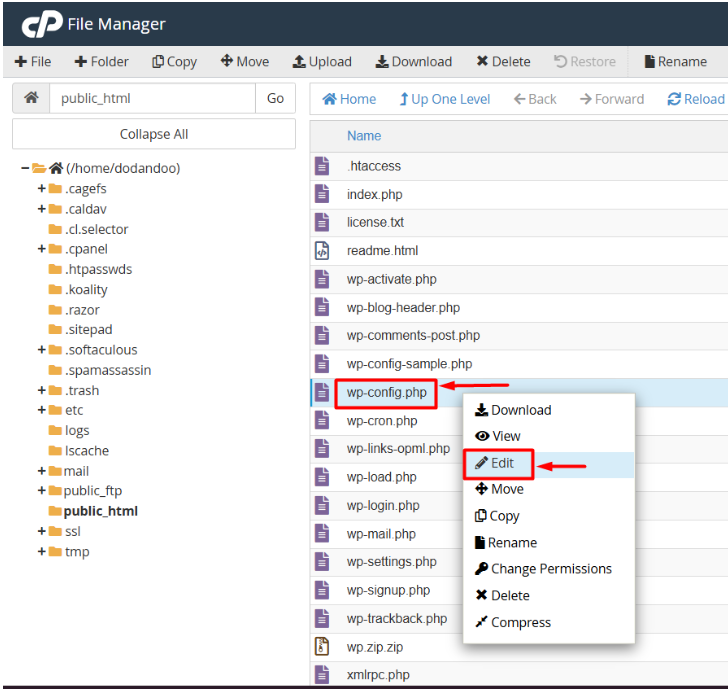
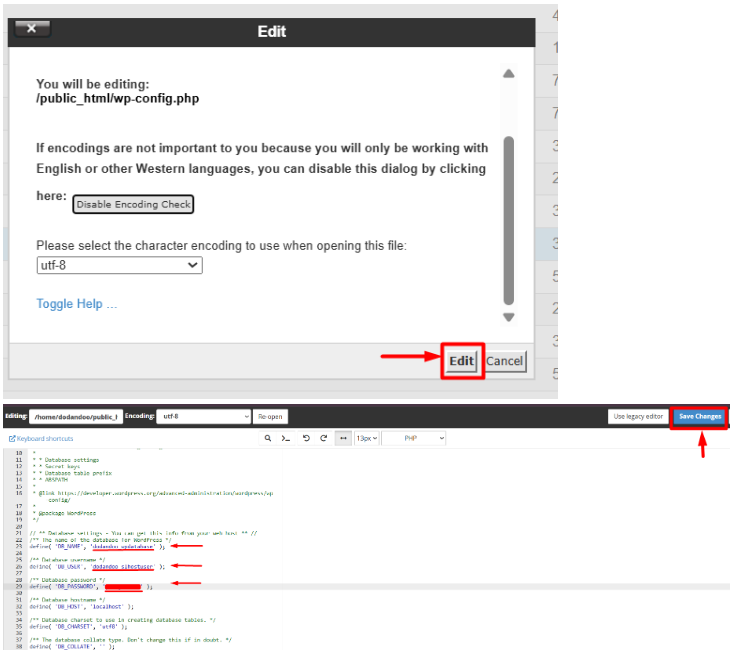
Step 8: Updating the wp-config.php file
- In cPanel’s File Manager, locate the wp-config.php file within your WordPress installation directory.
- Edit the file and update the database name, username, and password to match the credentials you created in cPanel. (that you noted).
- Click Save Changes.
Step 9: Final Checks
- In cPanel, go to “phpMyAdmin” under the “Databases” section.
- Select the database associated with your WordPress installation.
- Find the table named wp_options.
- Find the rows where the option_name is siteurl or home.
- Click the Edit button for these rows. Replace the existing URL with your new WordPress URL. Ensure you include https://
- Click Go or Save to apply the change.