Step 1: Login to Cient Area
- Click on My Account and login to client area.

- Enter your email address and password.
- Now click on Login and log to client area.
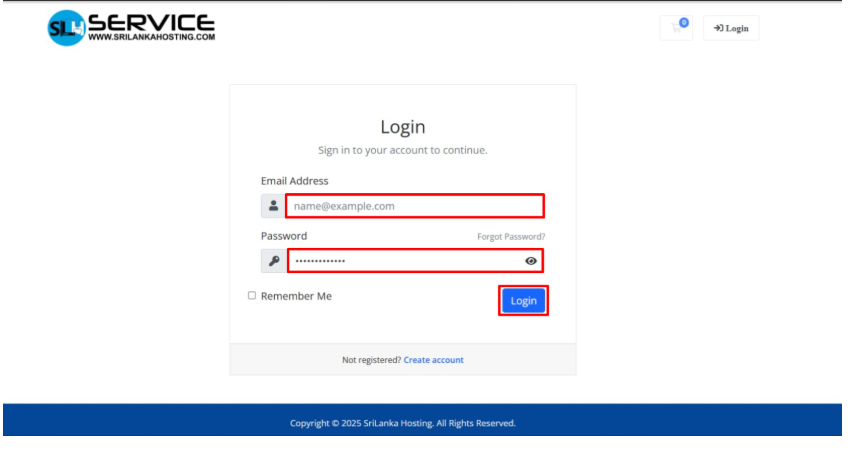
You are now in the Client Area.

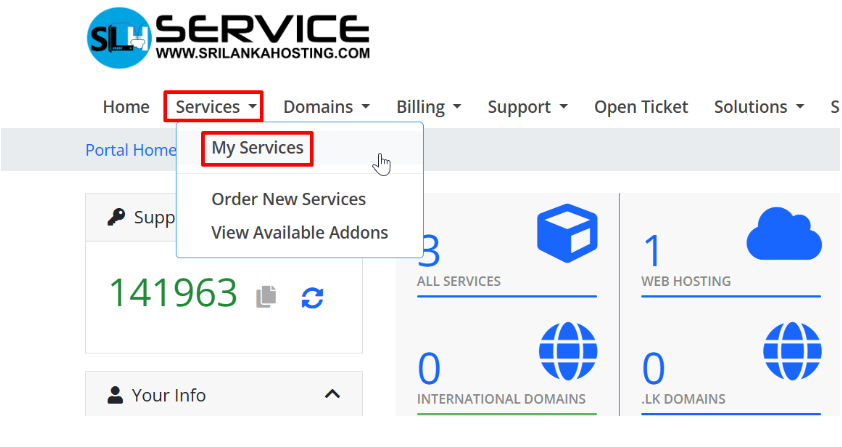
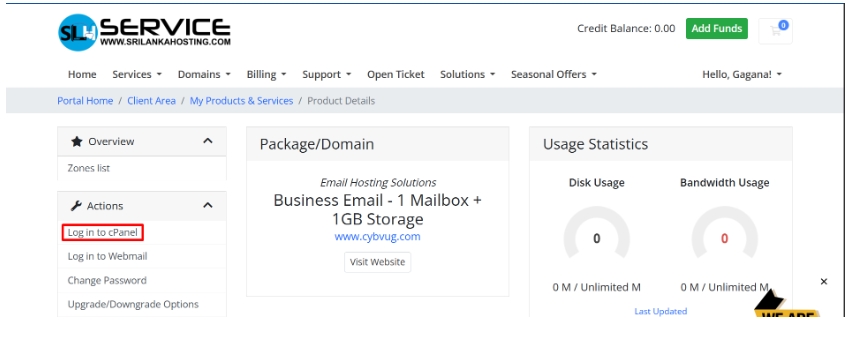
Step 2: Click on the Services and then select My Services
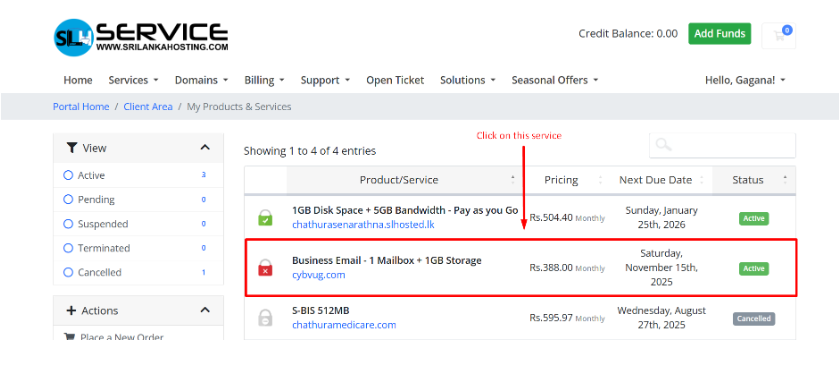
Step 3: After select your Business Email Solution
Step 4: Now click on Login to cPanel under the action panel
Now you are in the Cloud mail service.
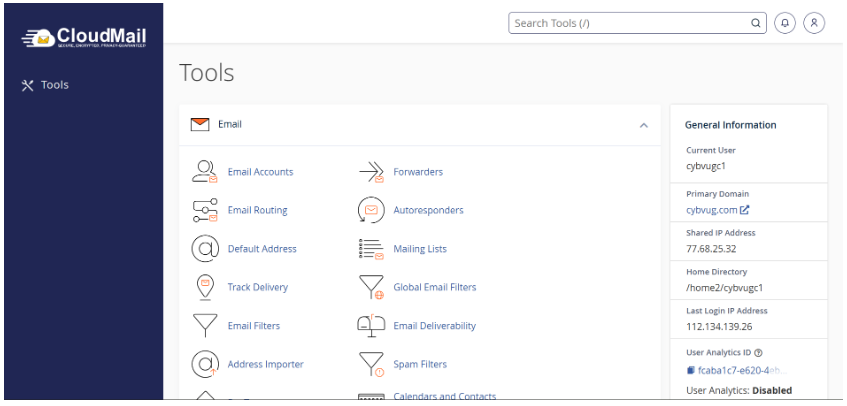
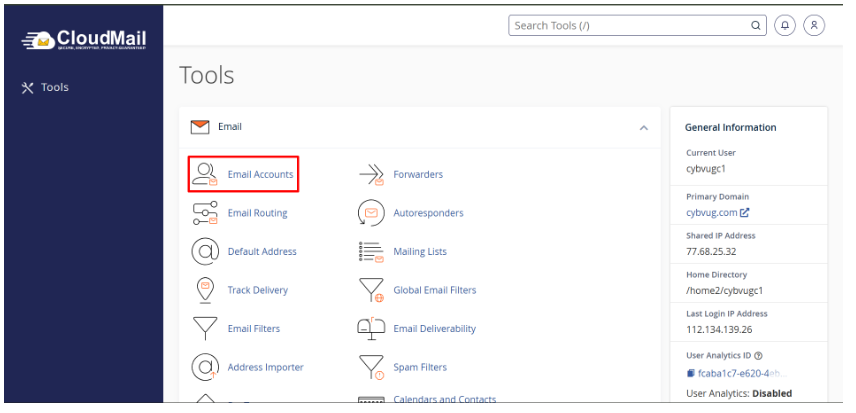
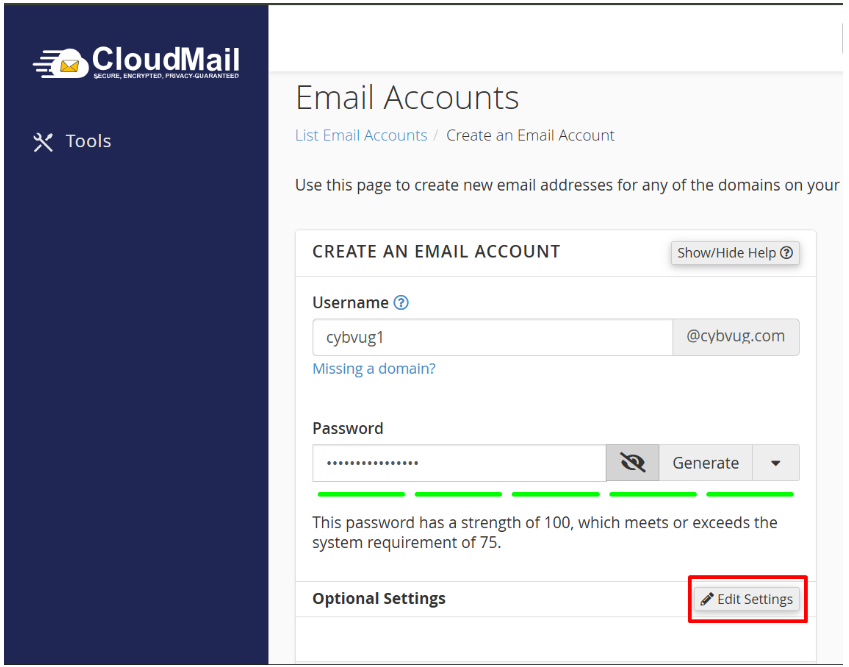
Step 5: Now go to Email Account
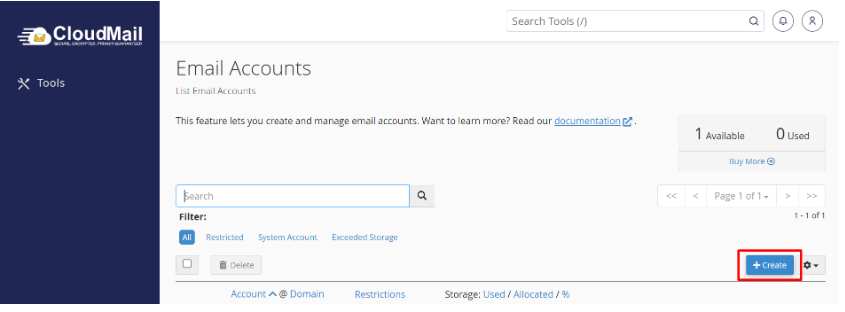
Step 6: Click the Create button and proceed to the Create an Email Account section
Go to these sections in order
- Type the username in the Username Field.
- Type the password in the Password Field you can generate a password using this. Click the Generate button and create a password.

- Next, click the Edit Setting button and proceed.
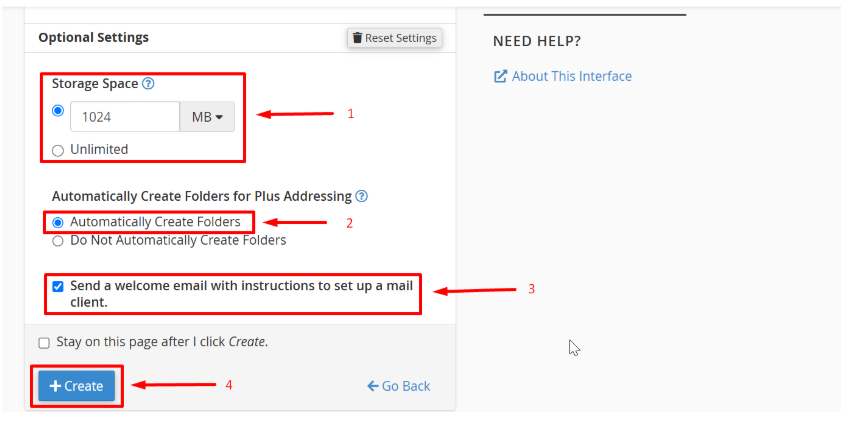
Go to these sections in order.
- In the Storage space section, you can give your desired amount of storage or if unlimited storage is provided, select the unlimited section.
- choose whether or not to create an automatic folder for the email.
- Select the checkbox to get email configuration settings. (You will receive the email in your webmail account after creating the email)
- Click the Create Button and create an email correctly.
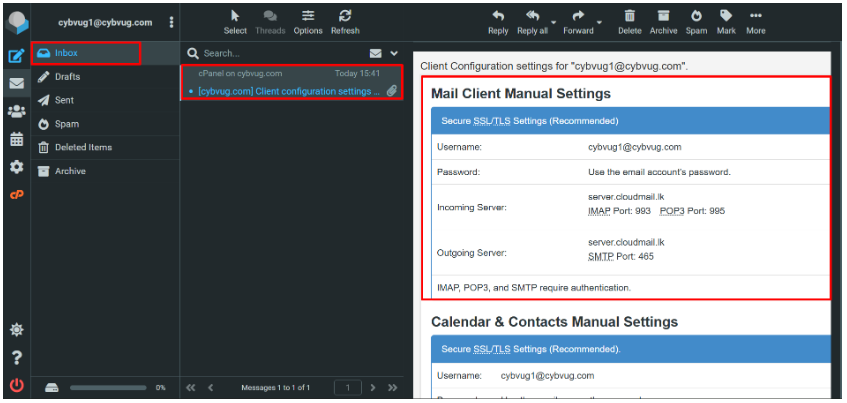
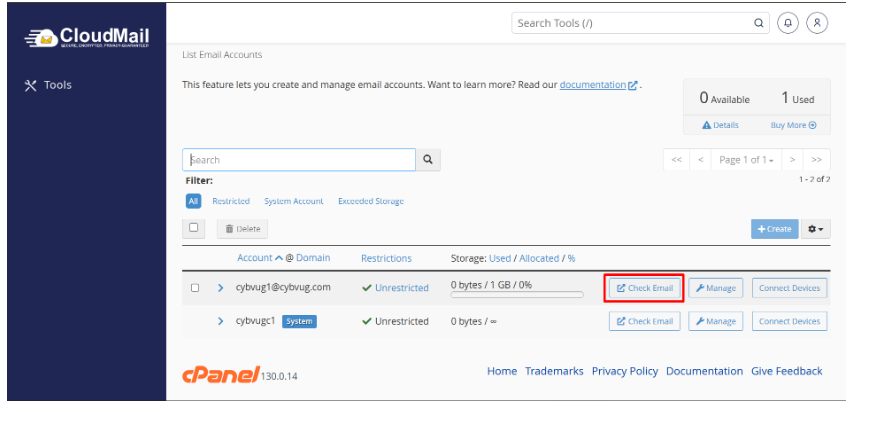
Note: After creating an email account, to obtain email configuration details, you need to log in to your webmail account, where you will find the email configuration details email
To login webmail
- you can use URL ( https://www.srilankahosting.lk/knowledgebase-new/log-into-webmail/ )
OR
- cPanel auto login option
Step 7: Select Check Email
Step 8: Select Open
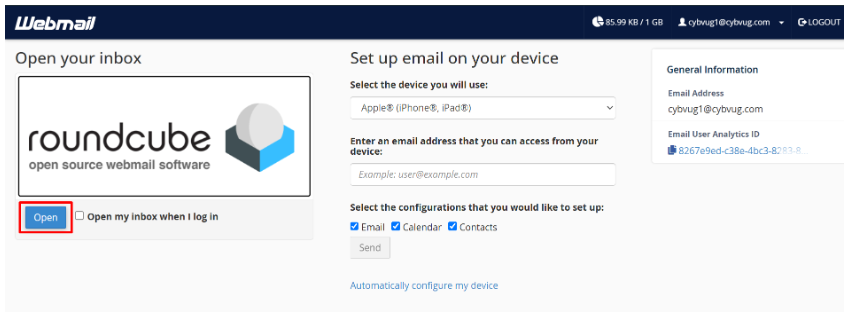
After that, you will be correctly logged in to Webmail, as shown in the interface below. There, you will find the email configuration settings email.