
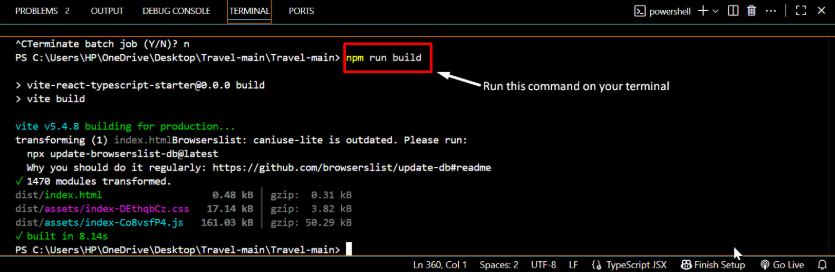
Step1 – Build Your React Project
• Open your React project folder on your local computer and open powershell.
• Run the build command:
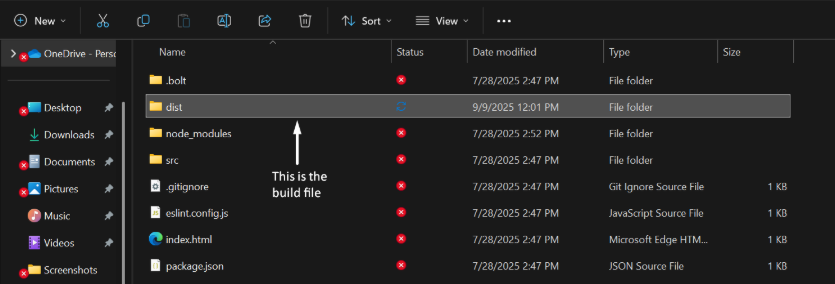
Step 2: Compress the Build Folder
• Go to the build folder in your project directory
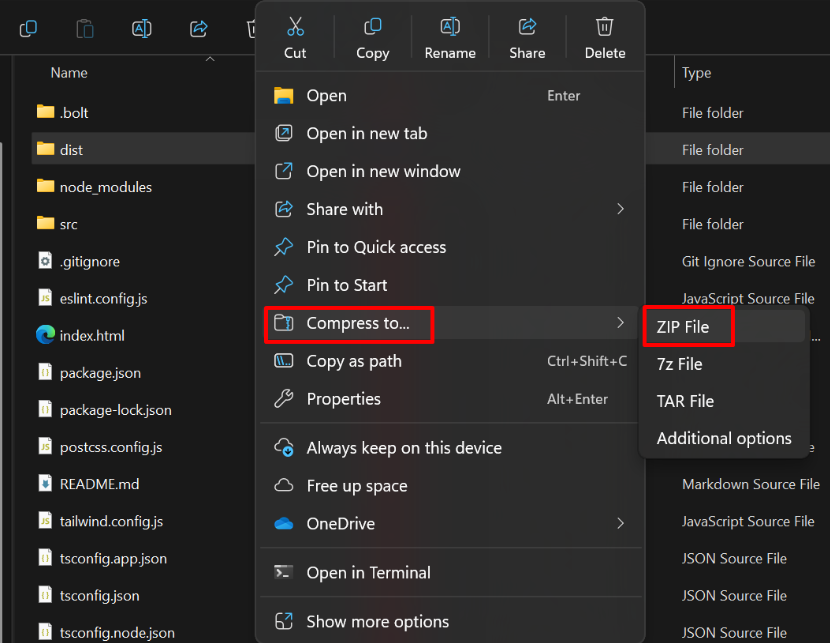
• Right-click → Compress/Zip the folder (you can name it react-build.zip).
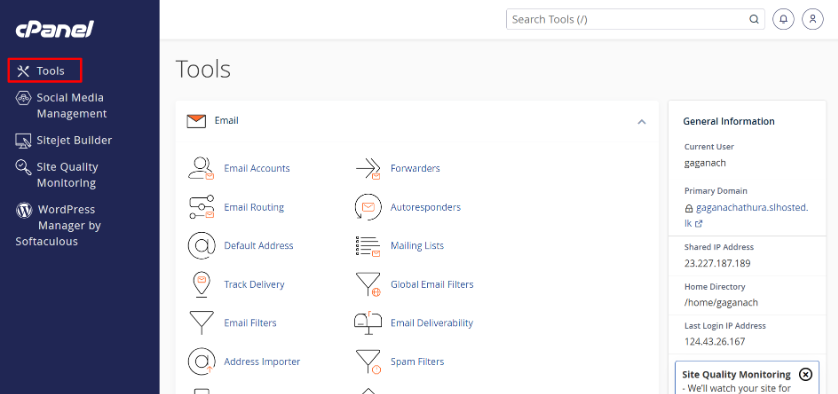
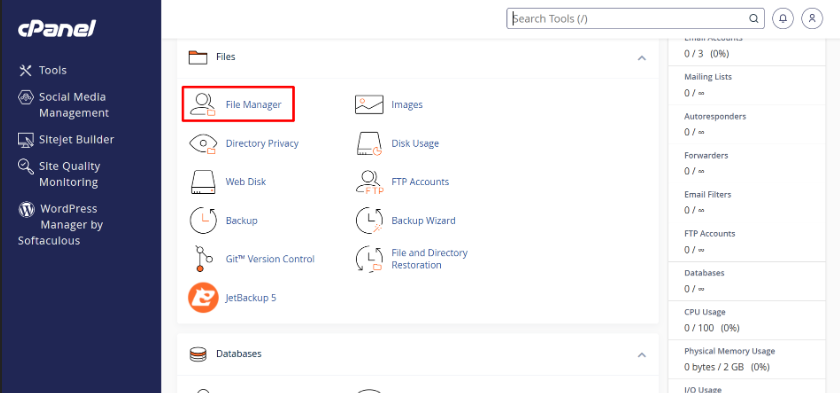
Step 3: Log in to cPanel
• Open your cPanel account in a browser.
• First go to Tools.
• Then go to File Manager.
Step 4: Upload Your React Build Zip file
1.In File Manager, navigate to the folder you want to host your site go public_html on file manager.
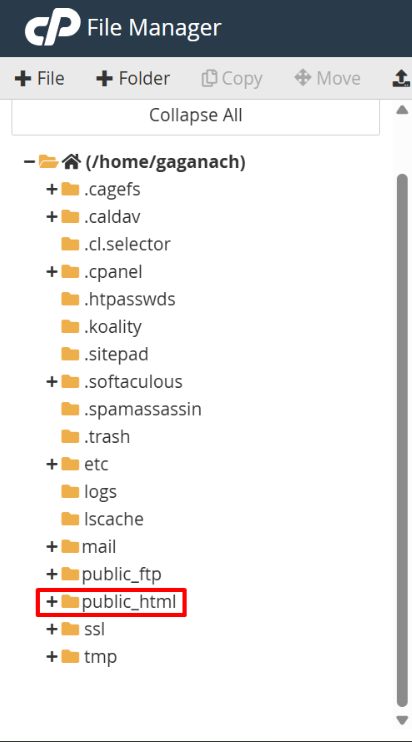
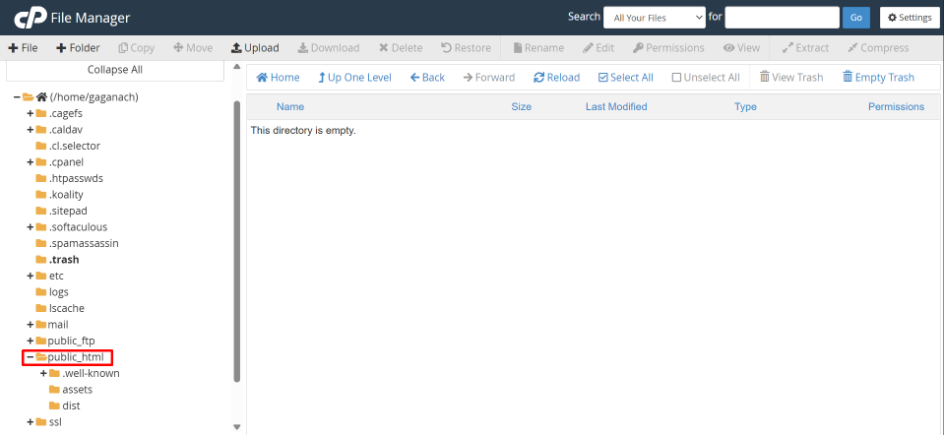
2.Must need to public_html folder is empty.
• if it has any files you can move it to trash.
3.Now you can upload your build.zip to public_html folder upload area.
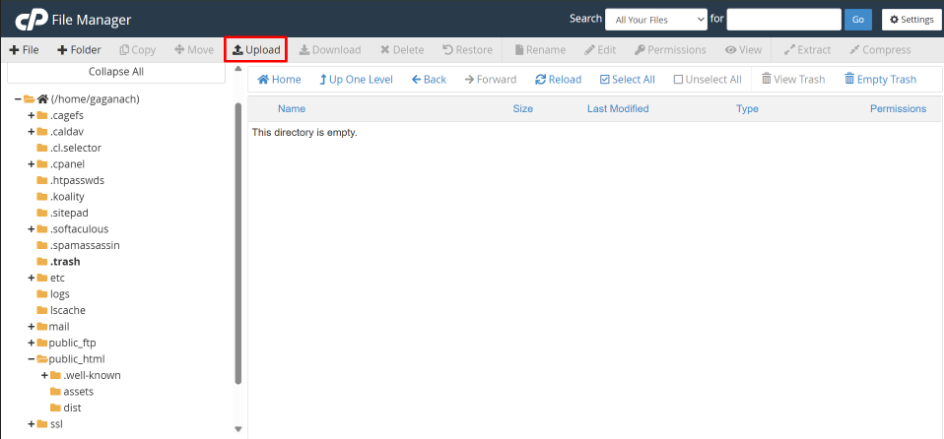
4.Now you can extract zip file.
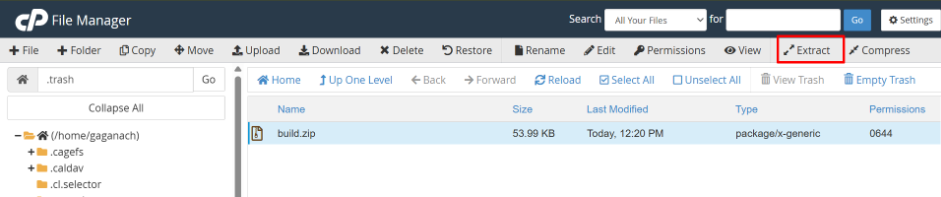
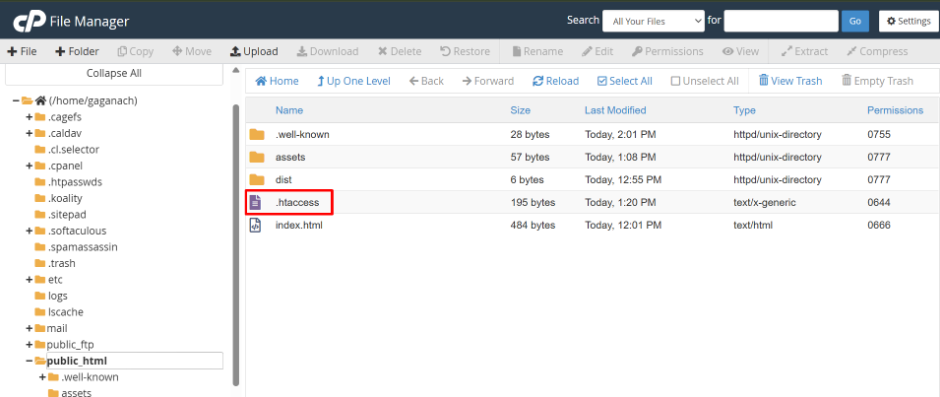
Make sure the index.html and other files are directly inside public_html (not nested inside another build folder).
Step 5: Set Up .htaccess for React Routing
• If your React app uses React Router, create a .htaccess file in public_html.
• You want to customize the content of .htaccess files according to your web site’s framework.(react,php,wordpress)
• Right click on .htaccess file and go edit. Then you can add the relevant content for your framework.
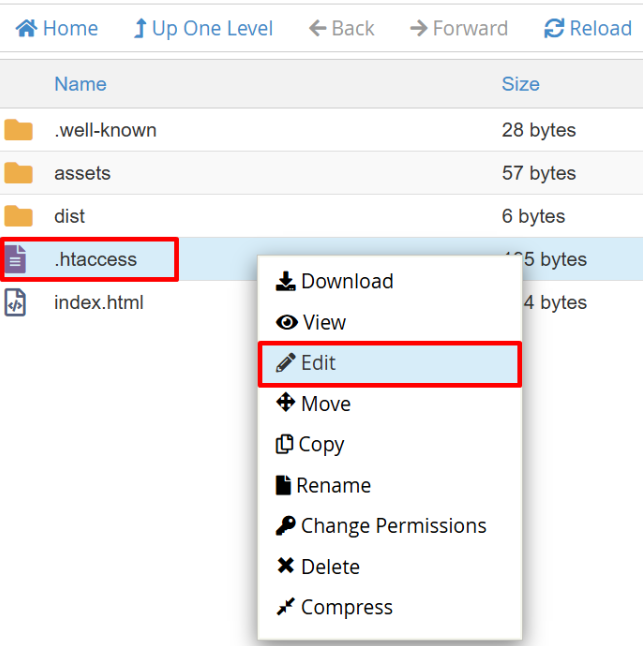
• After add your content and apply save changes.

Step 6: Test & Run Your Website
Open your domain in a browser.